Please find list of related blogs:
| Cloud Print Manager – Install and Configure |
| Output Management – Customize Master Form for Logo Address Tel Fax eMail |
| Output Management – Customize Content Form for Outgoing Check |
In SAP S/4HANA Cloud, Adobe forms (XFA) are the standard technology for rendering application objects (such as purchase orders, contracts, or invoices) into PDF format. Output management in the cloud provides the necessary framework for form template development and maintenance, data assembly, rendering, and output determination for forms.
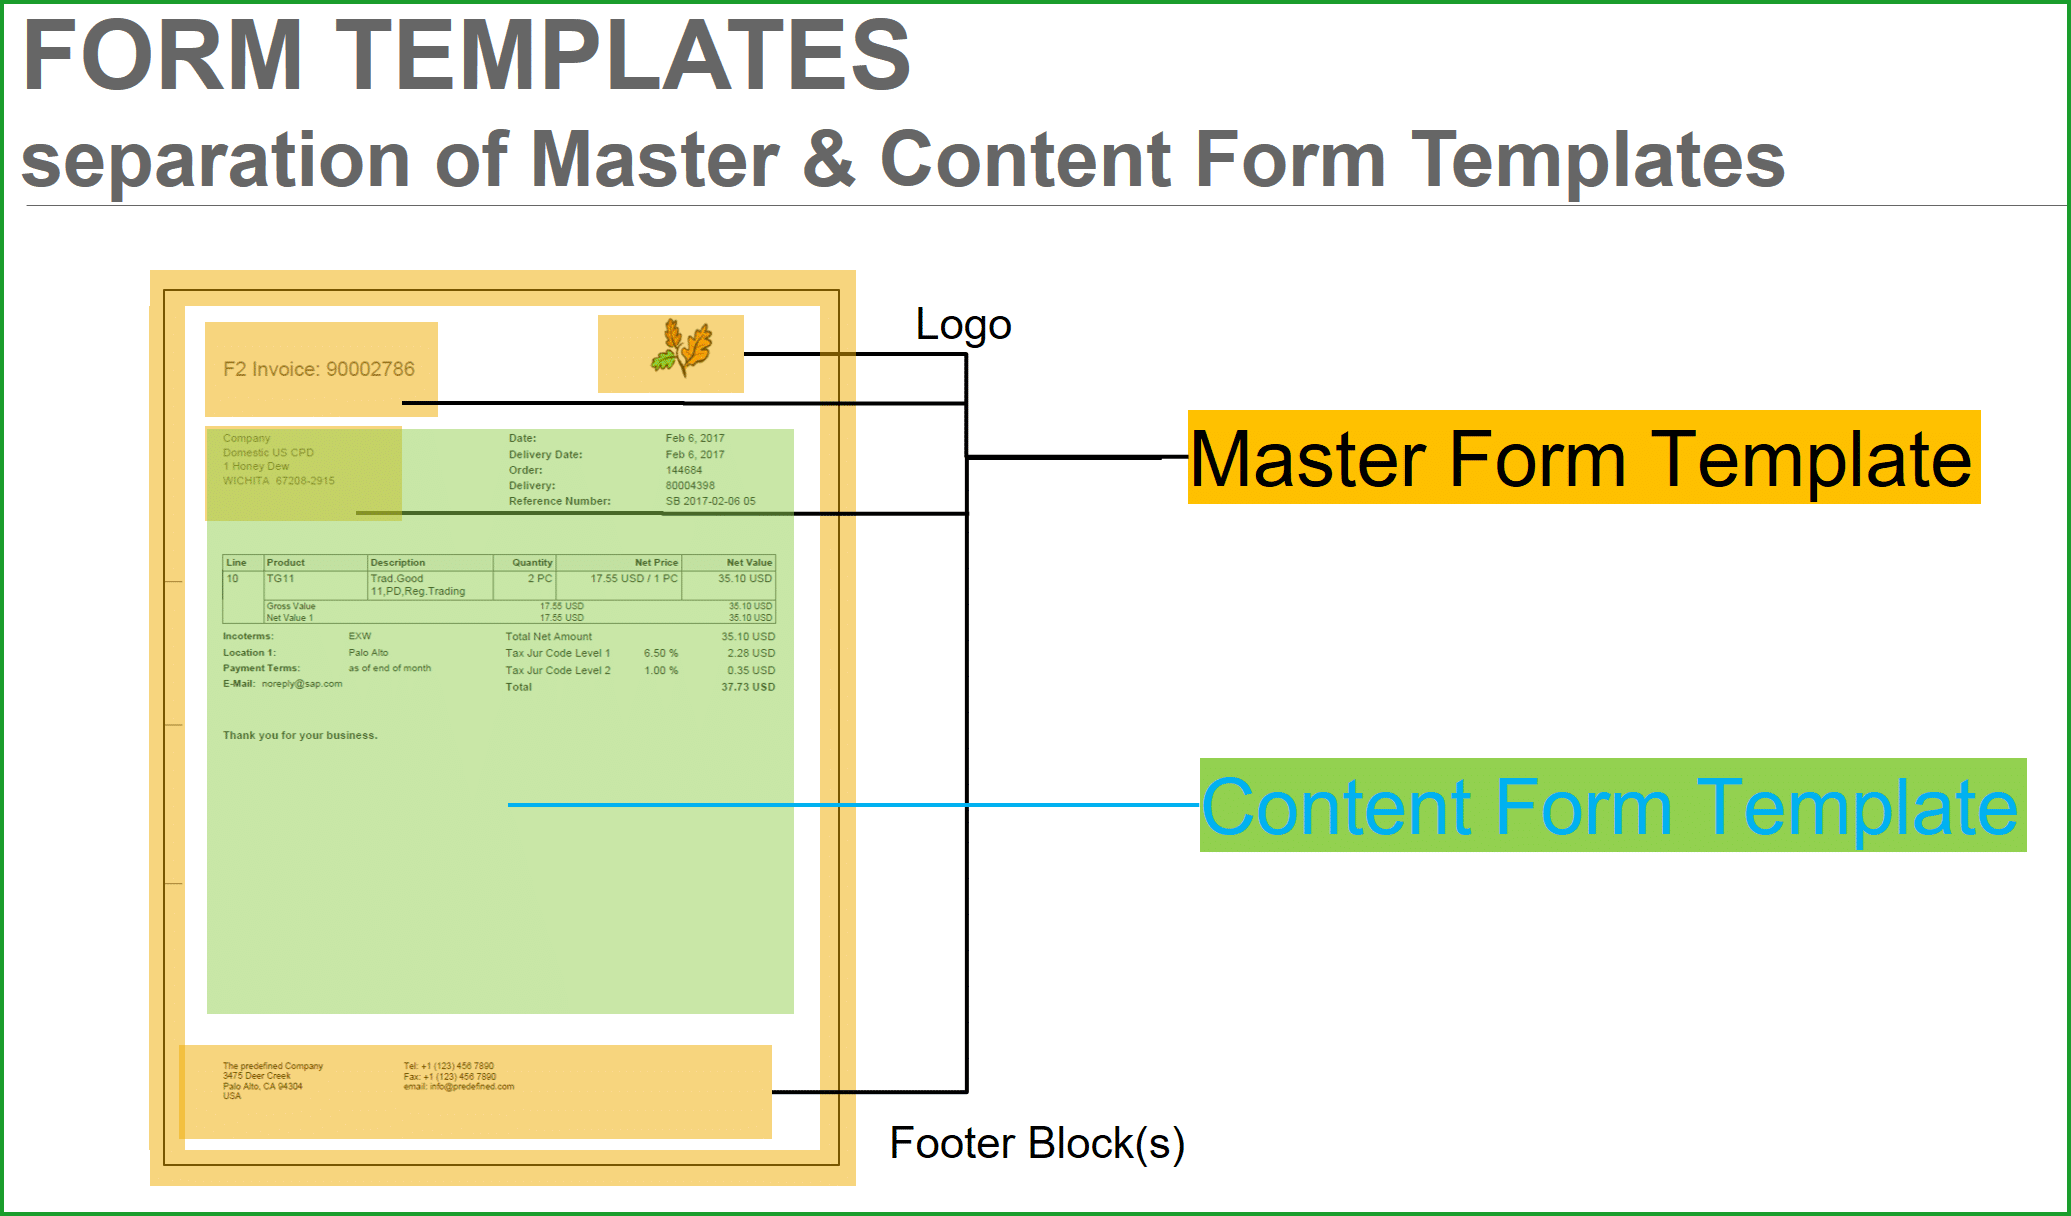
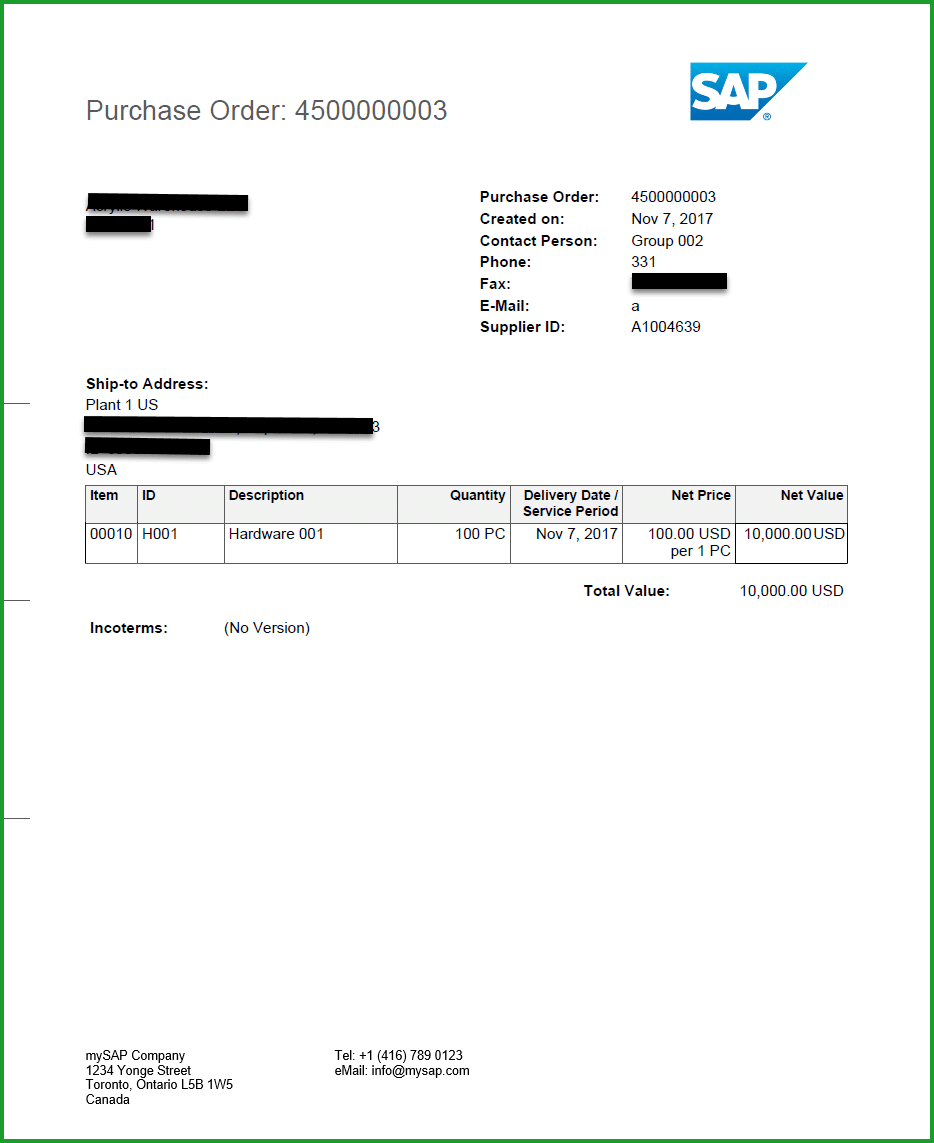
The form is separated into two parts Master Form Template & Content Form Template as shown in the graphic below. The blog shows how to customize the Master Form Template, shown here in black lines for logo & Footer Blocks – Address, Tel/Fax/eMail. There is a separate blog to customize Content Form Template which is shown in Blue arrow with shading in green.
One Master Form Template can be shared between different Content Form Templates as below:
Billing Document Scheduling Agreement Purchase Order Sales Document Outgoing Check Purchase Contact Payment Advice Accounting Document Item Outbound Delivery Goods Movement Physical Inventory Request for Quotation Supplier Invoice Settlement Document Production Planning Manufacturing Order
TIP: To check if printing is setup correctly the easiest way in case of ERP/S4HANA on-prem is to send screen printout to the printer, but with S/4HANA cloud will have to create any of the above documents and setup Output Determination, etc.
Please note that you should download/modify/upload template in Q-System. After it is uploaded in Q, you can move across landscape using Q-System tile “Export Software Collection” and then import into P-System using tile “Import Software Collection”.
STEP 1: INSTALL ADOBE LIVECYCLE DESIGNER
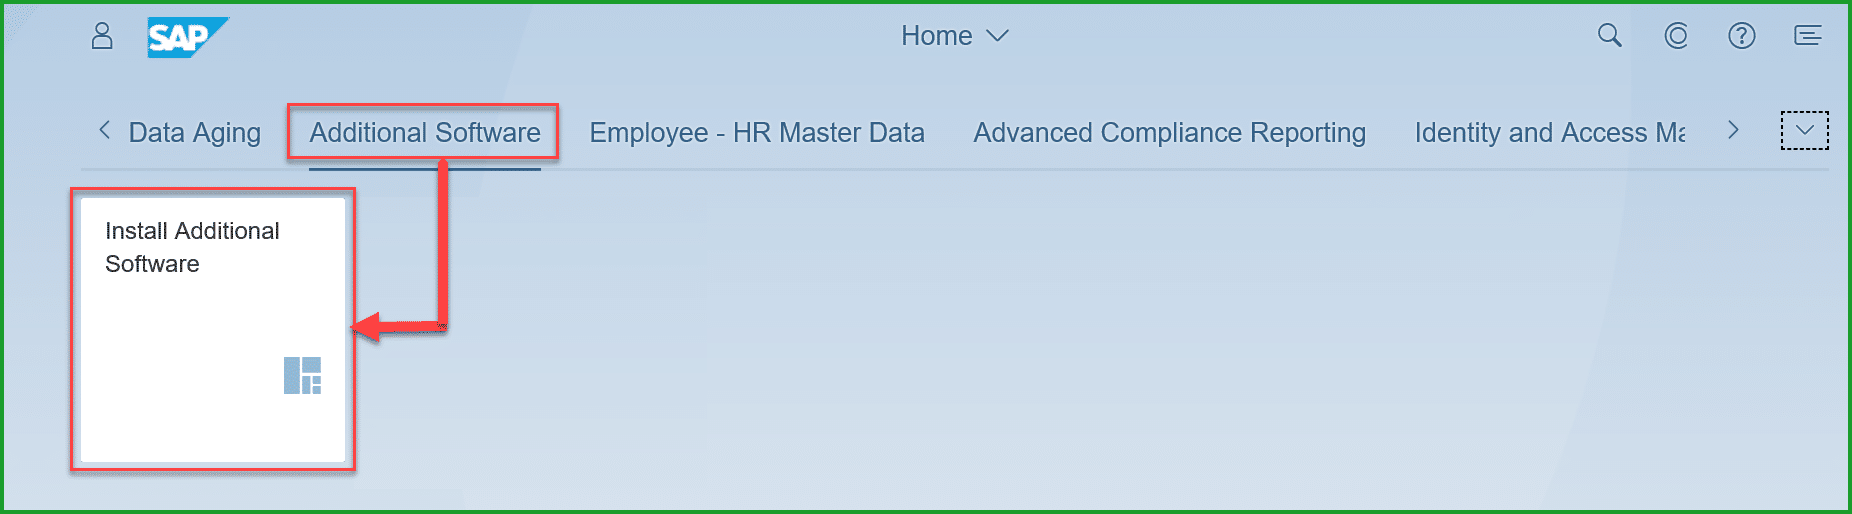
Select Fiori app from Group – Additional Software, Fiori tile – Install Additional Software. You will require authorization with business role SAP_BR_ADMINISTRATOR business catalog SAP_CORE_BC_IAS.
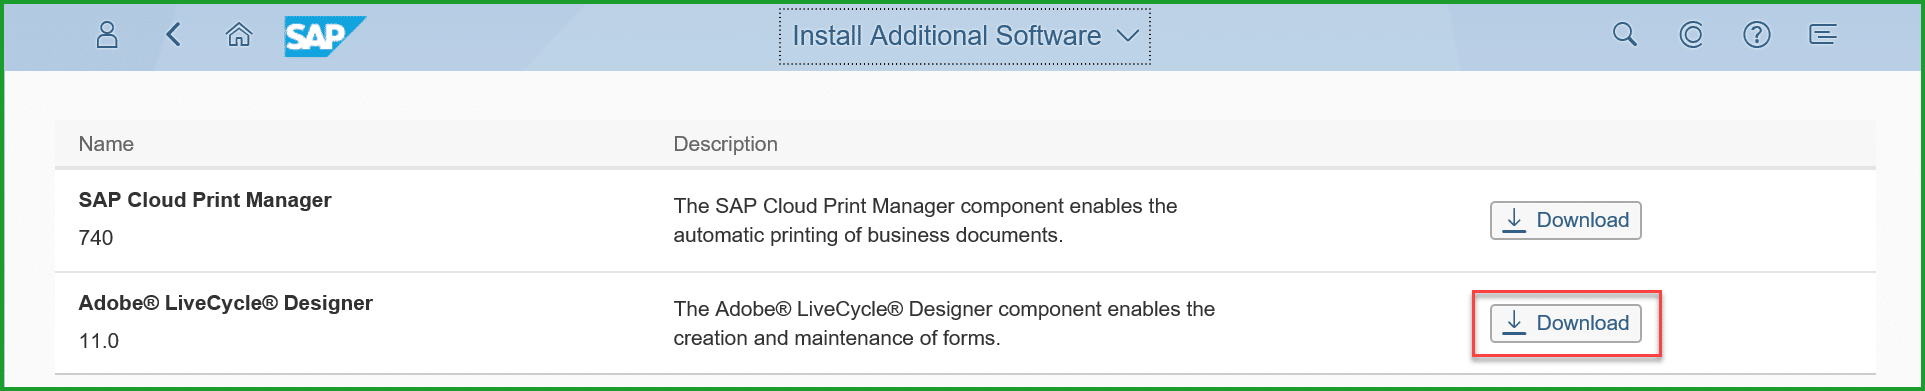
Click on Download for Adobe LiveCycle Designer. This is a 32-bit application that runs on both platforms 32-but as well as 64-bit.
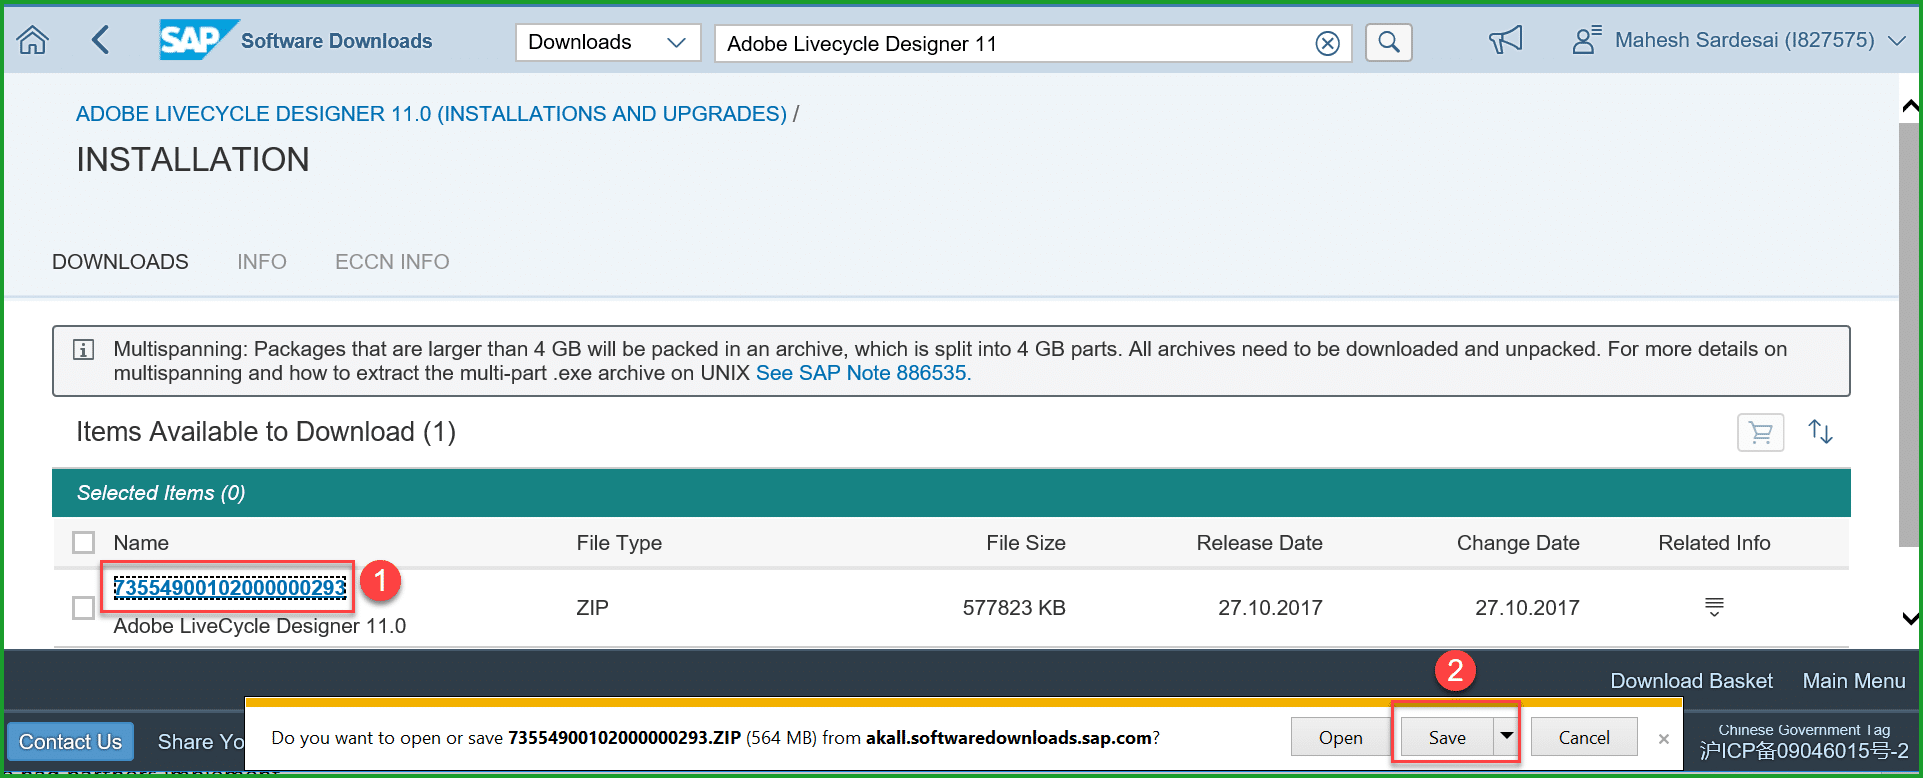
The system will prompt for S-User id login to the SAP Service Marketplace and your S-User id requires download authorization. Click on the (1) File and click (2) Save.
Locate ZIP file in download folder and extract, RightClick SapAldSetup.exe and select below:
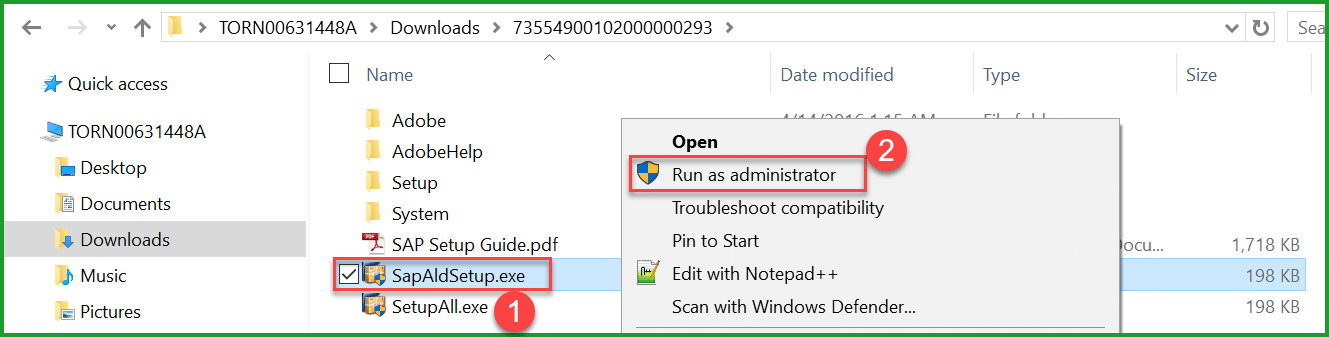
Front End Installer is started, follow defaults to install software on desktop.
STEP 2: DOWNLOAD MASTER FORM TEMPLATE
Select Fiori app from group – Output Management, Fiori tile – Maintain Form Templates. 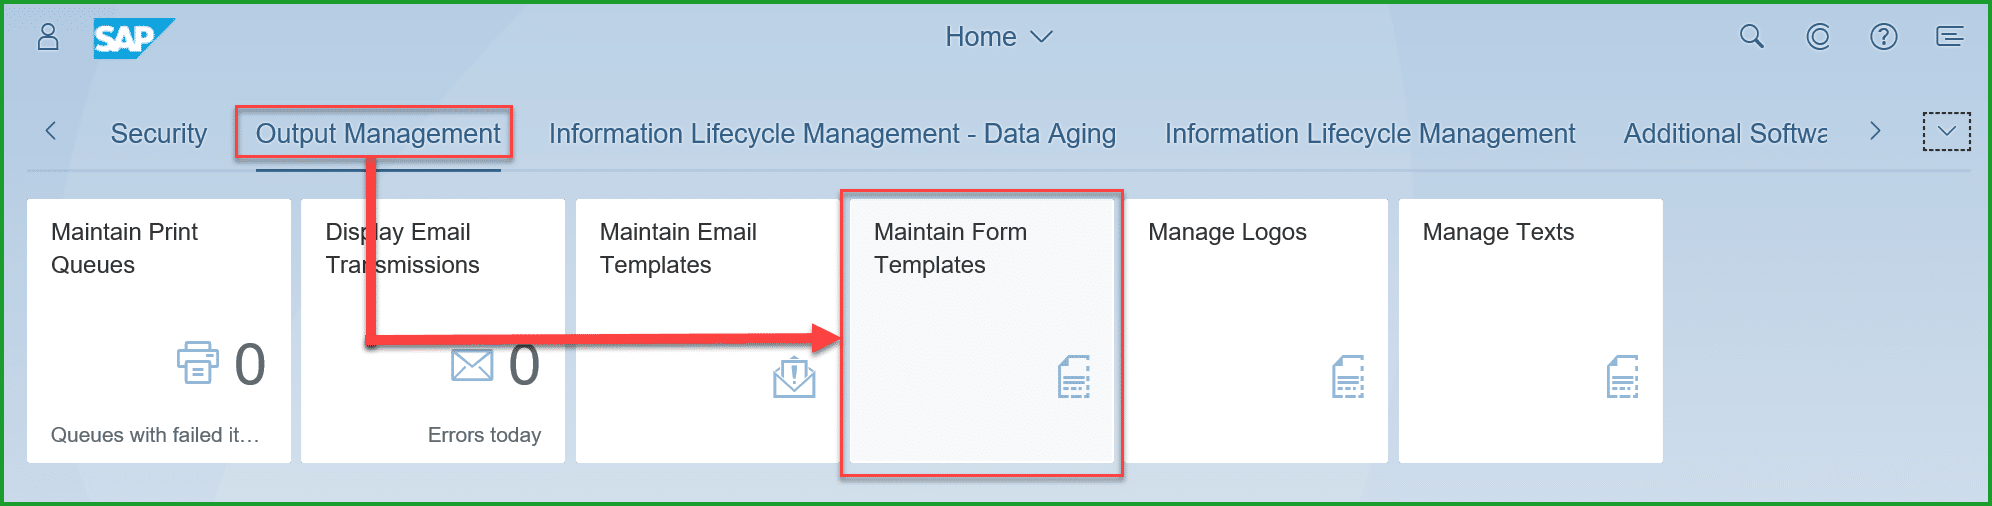
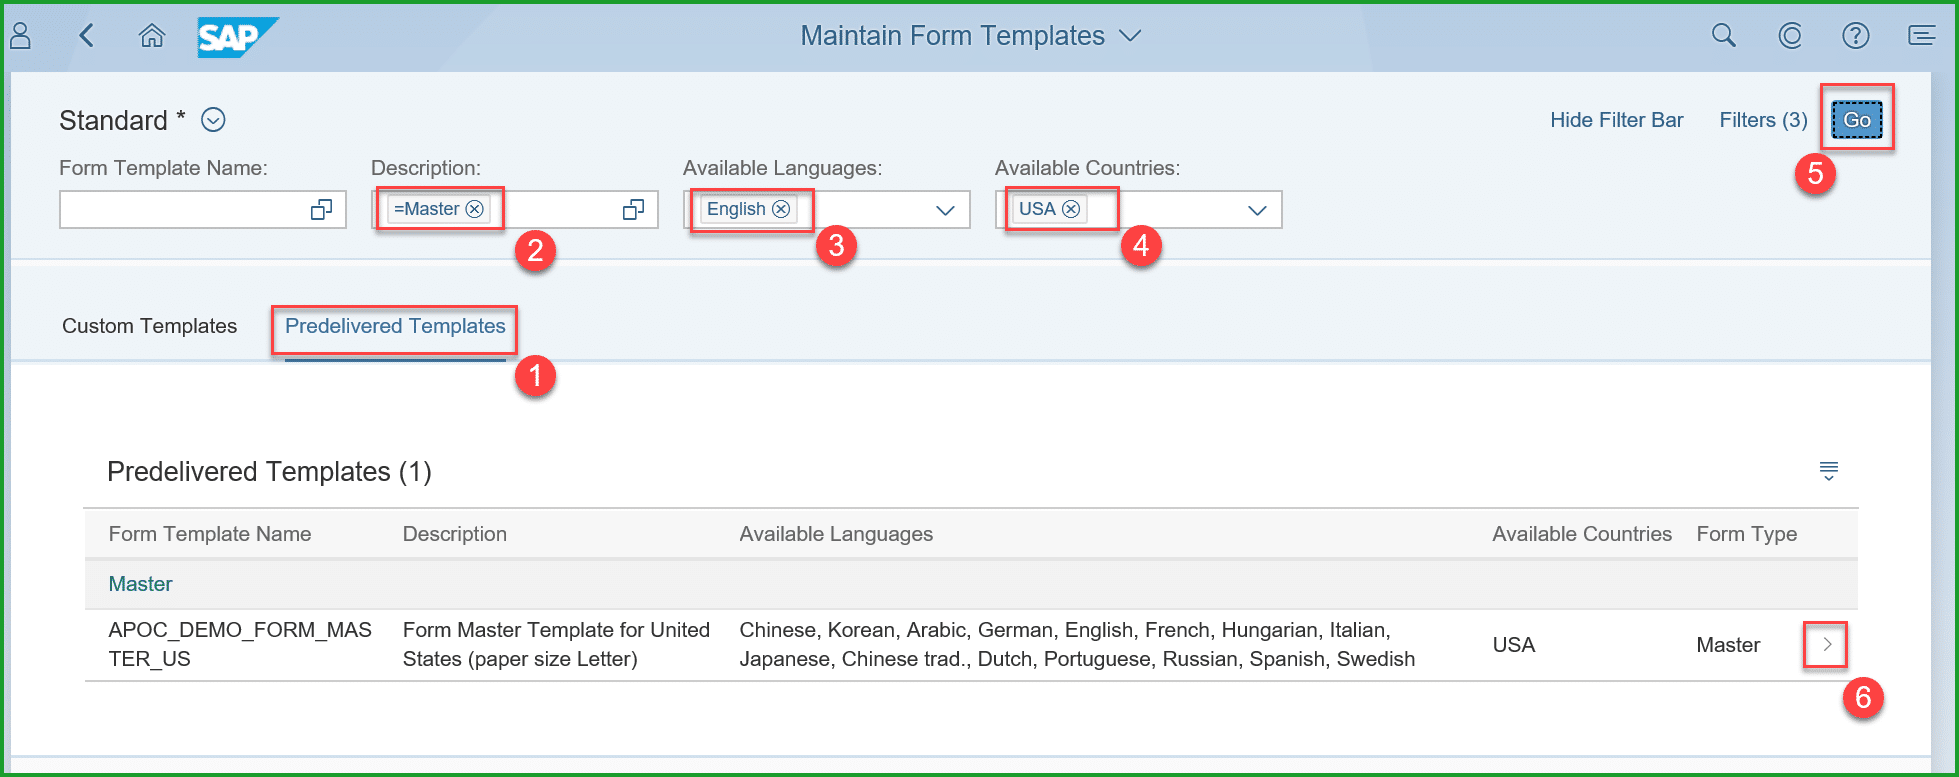
To easily select the template, please set filter as required – click on (1) Predelivered Templates, (2) Description as Master, (3) Available Languages as English, (4) Available Countries as USA, Click on (5) Go and (6) RightArrow to open the Master Template.
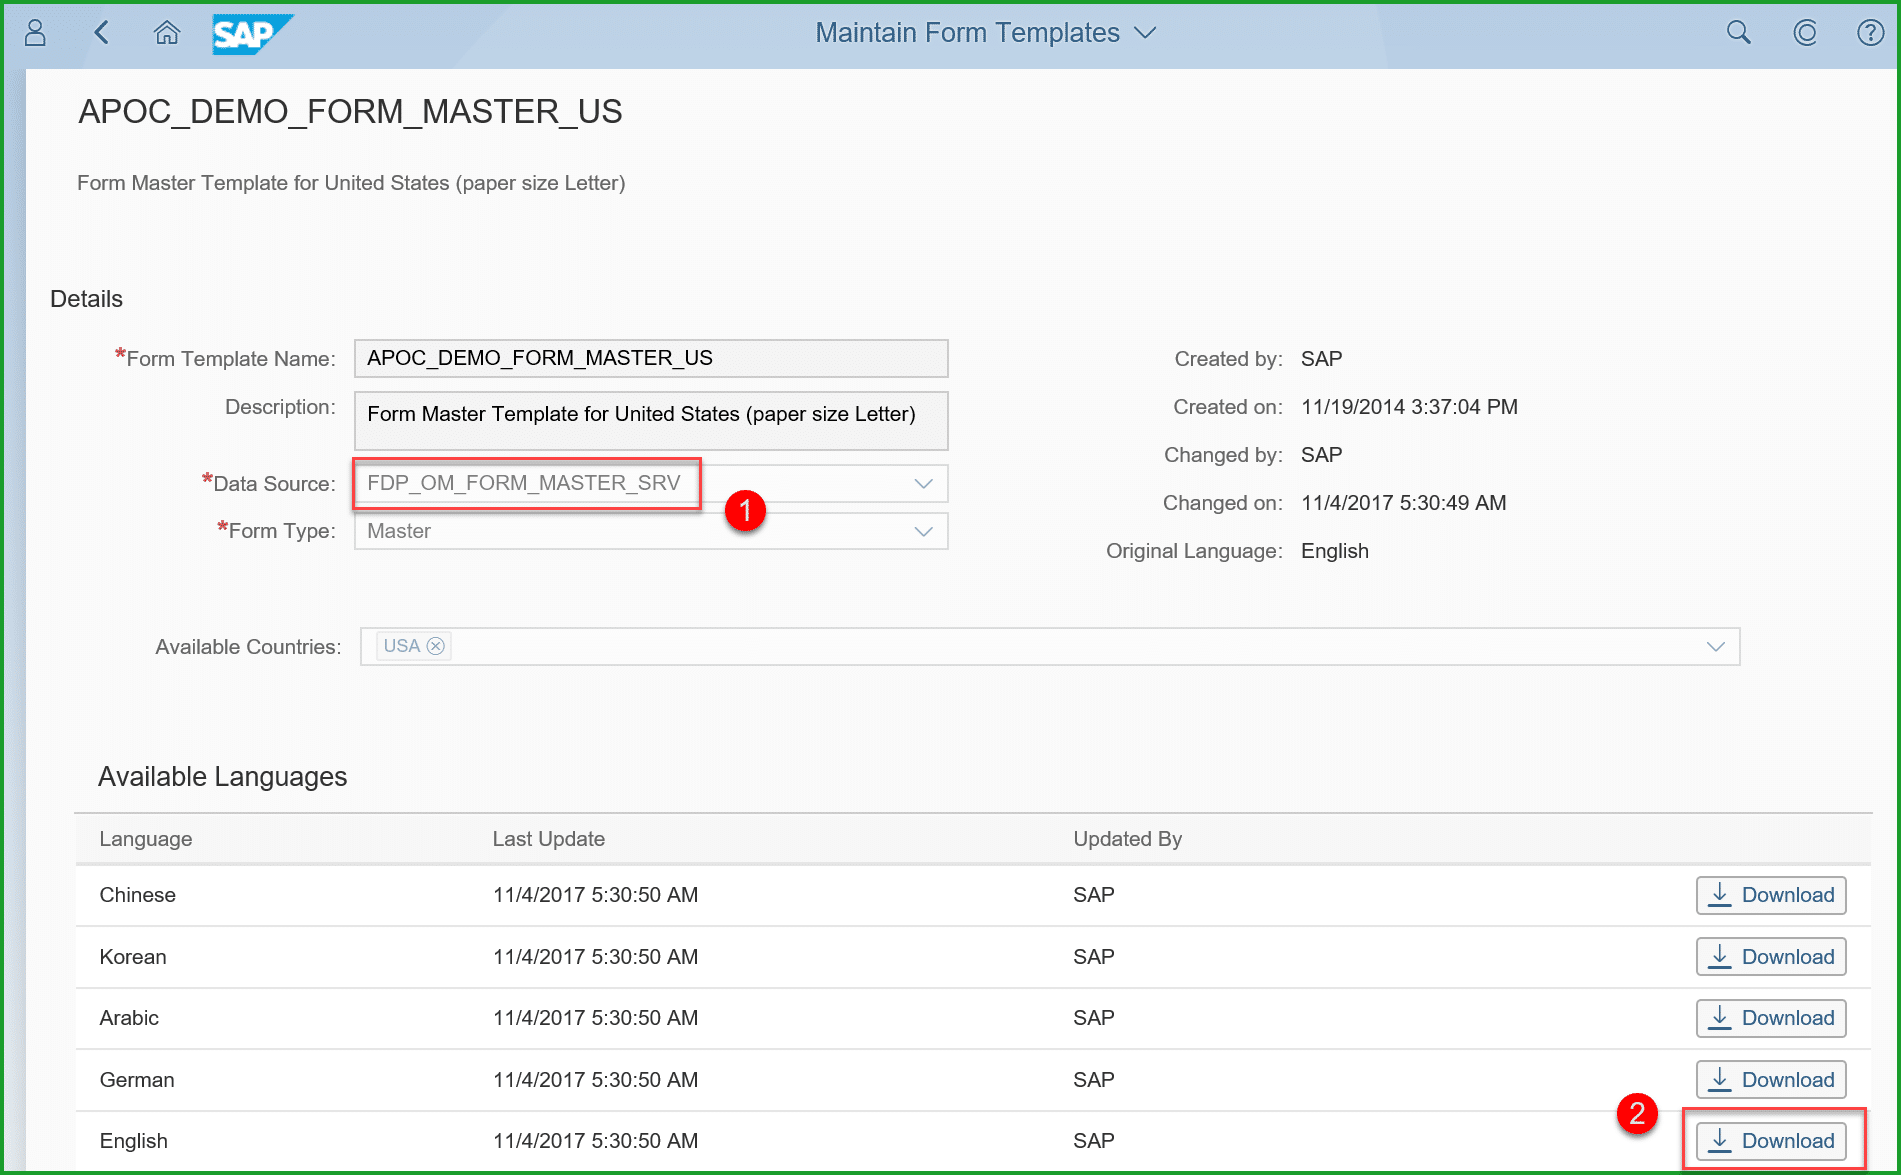
Note (1) Data Source as FDP_OM_FORM_MASTER_SRV. This will be needed later when uploading the Master Form Template. Click on (2) Download
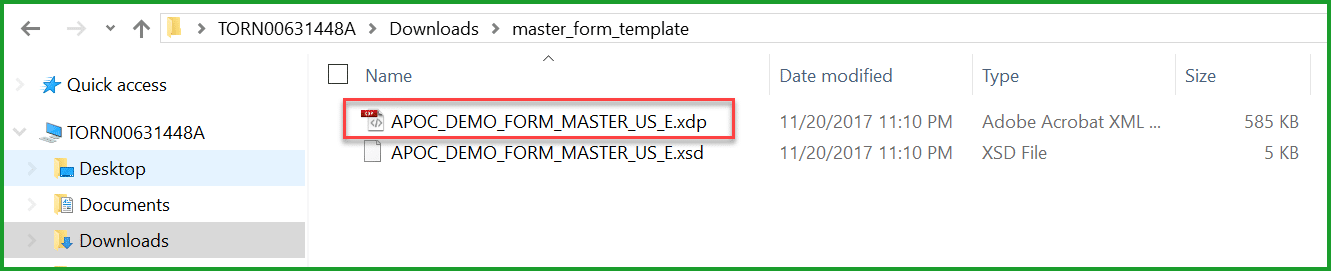
Create folder master_form_template
Save as file master_form_template.zip and extract
STEP 3: EDIT MASTER FORM TEMPLATE
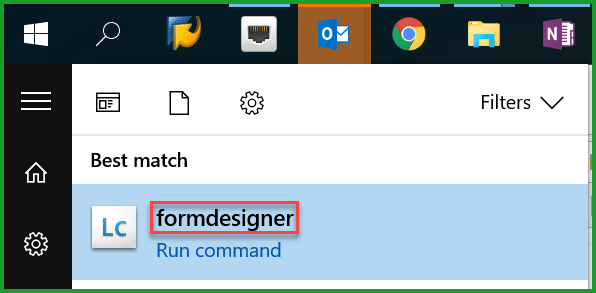
Start Adobe LiveCycle Designer. If you are looking for the application in Windows 10, and don’t have shortcut, please type Windows Key + “formdesigner” as below to locate below
Open file APOC_DEMO_FORM_MASTER_US_E.xdp and select Yes for question “Do you want Designer to update the connection using the modified XML Schema”
The Master form template is a separate XDP file and contains different layout definitions (fragments): Landscape_Factsheet,
Landscape_ItemList,
Portrait_Factsheet,
Portrait_ItemList,
Portrait_OutboundLetter.
Only one of them at a time can be referenced by the application form. Purchase Order uses the last fragment above. Each fragment is designed for a specific page orientation (landscape or portrait) and layout variant (fact sheet, item list or outbound letter).
Each fragment includes first page (mst1) and subsequent pages (mst2).
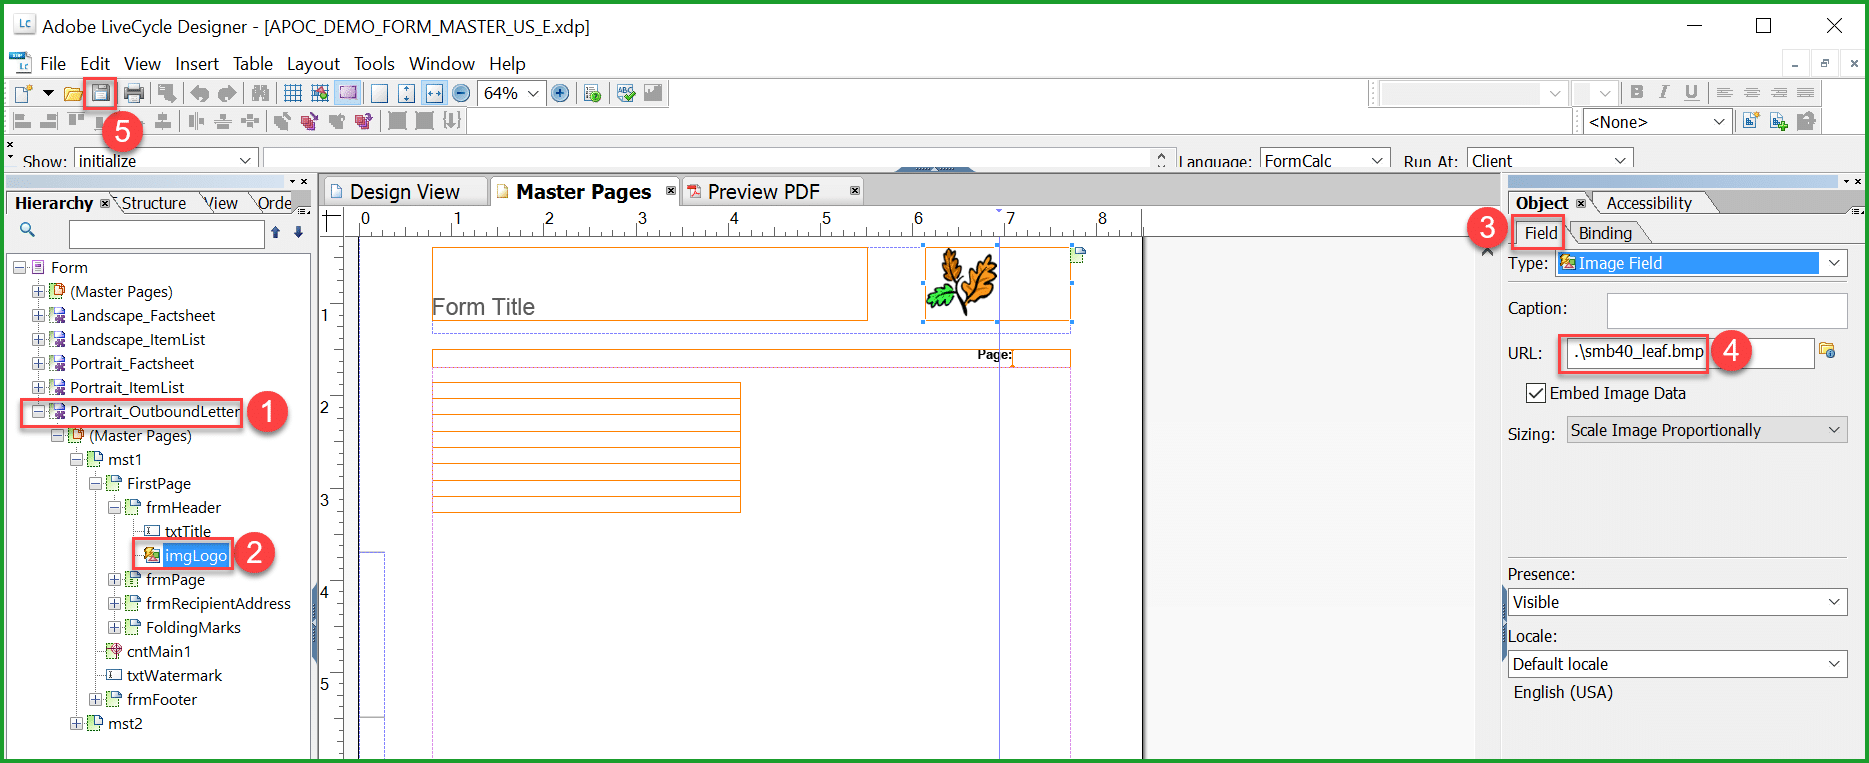
Expand Portrait_OutboundLetter, click on imgLogo, tab Field and point URL to the logo file location on the desktop.
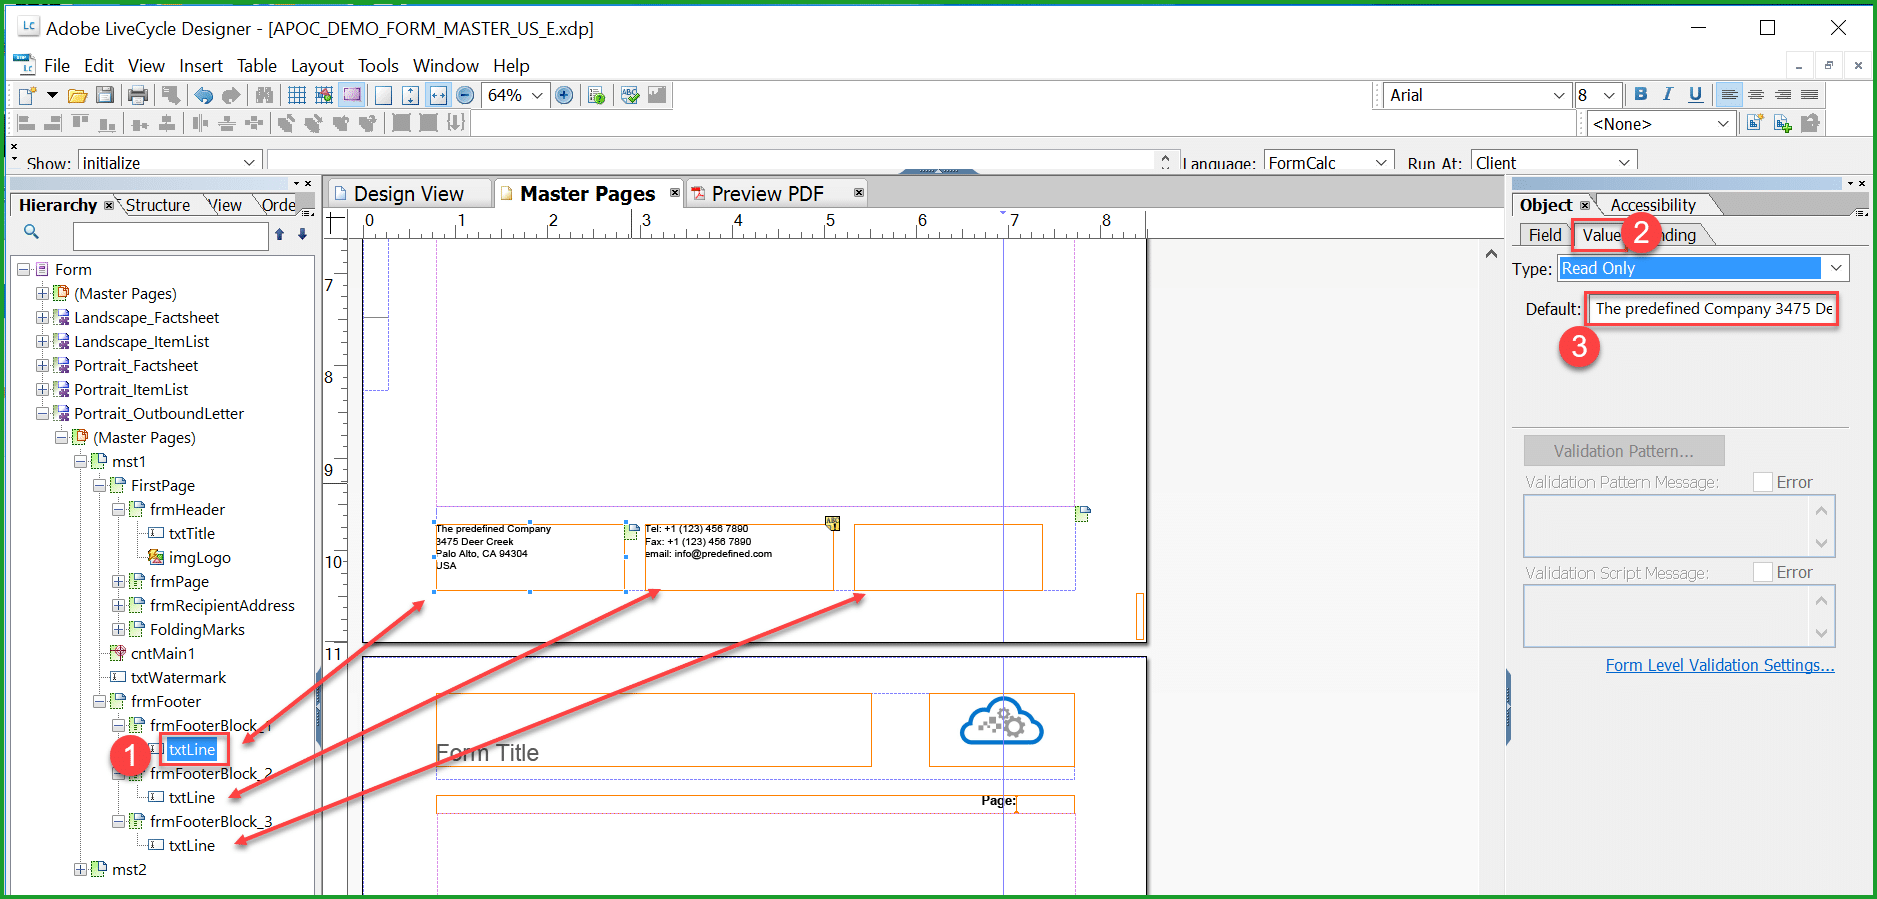
In order to change Address, Tel/Fax/eMail you should select corresponding (1) txtLine and click on tab (2) Value to edit (3) Default. The figure shows the objects corresponding to the three footer boxs.
TIP: Please note that in the Default text there is a "line feed" character between “The predefined Company” and “3475 Deer Creek” which you cannot see.
So you have to replace text before and after this character. The easy way is to use Nodepad++ to edit the address data and paste it back into the field in formdesigner. In Notepad++ first take menu option Edit => EOL Conversion => Unix (LF)Type the text as above and then paste it back into the formdesigner. Once you have all the details, click on Preview PDF to see the changes. You may have to edit this in Fragment Landscape_Factsheet to see the preview and then paste the same text over to Portrait_OutboundLetter.
TIP: You should edit the same logo and footer text in the other fragments, (namely - Landscape_Factsheet, Landscape_ItemList, Portrait_Factsheet, Portrait_ItemList) as some of these may be used by other documents. For each of these fragments, change has to be made 2 times – under mst1 (first page) and then mst2 (Subsequent pages). There are 10 places to replace the logo and Footer boxes in the entire master template.
Save the form appropriately as for e.g. MYCOMPANY_FORM_MASTER_US_E.xdp
STEP 4: UPLOAD MASTER FORM TEMPLATE
In Q System select the Fiori group – Output Management -Fiori tile Maintain Form Templates.

Click on (1) New, enter (2) Form Template Name, (3) Language, (4) Select Form Template File, (5) Data Source – this should be the one you noted down from STEP 2 DOWNLOAD MASTER FORM TEMPLATE which is FDP_OM_FORM_MASTER_SRV, (6) Form Type as Master, click on (7) OK
The system uses the OData Service to access the custom form.
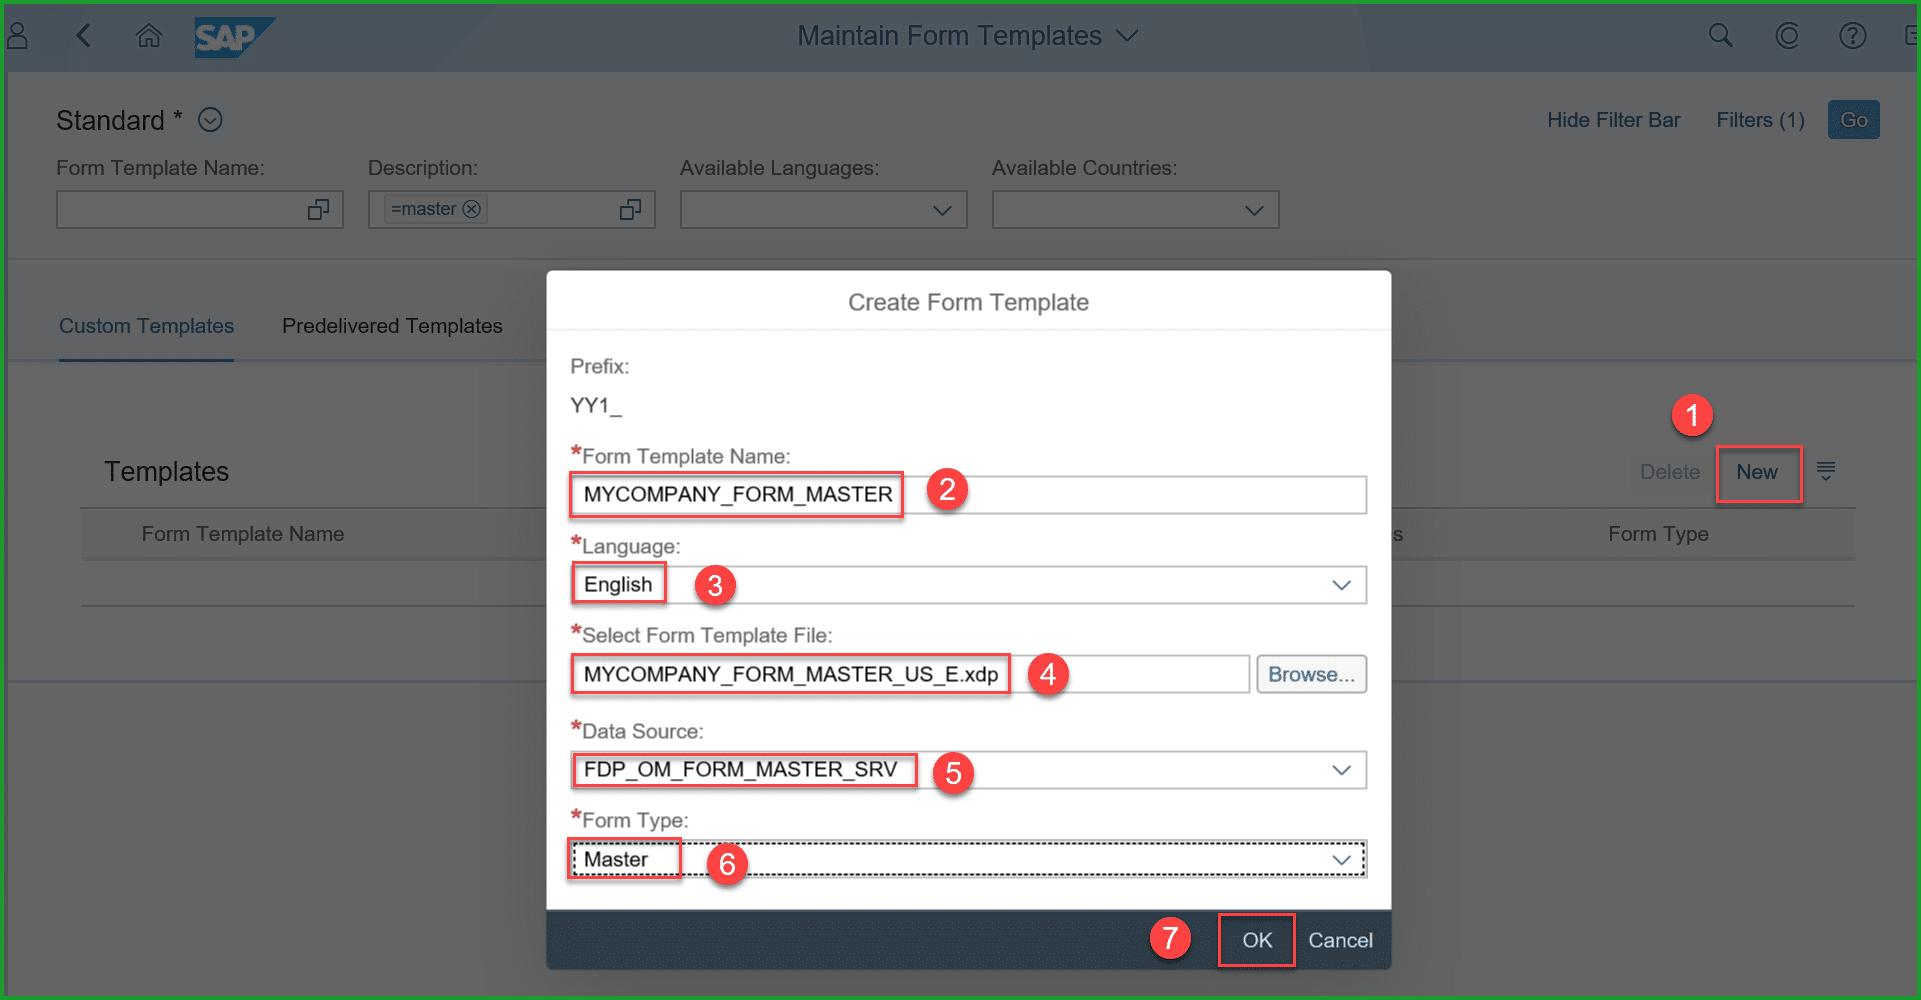
Please pay special attention to select the correct Data Source.
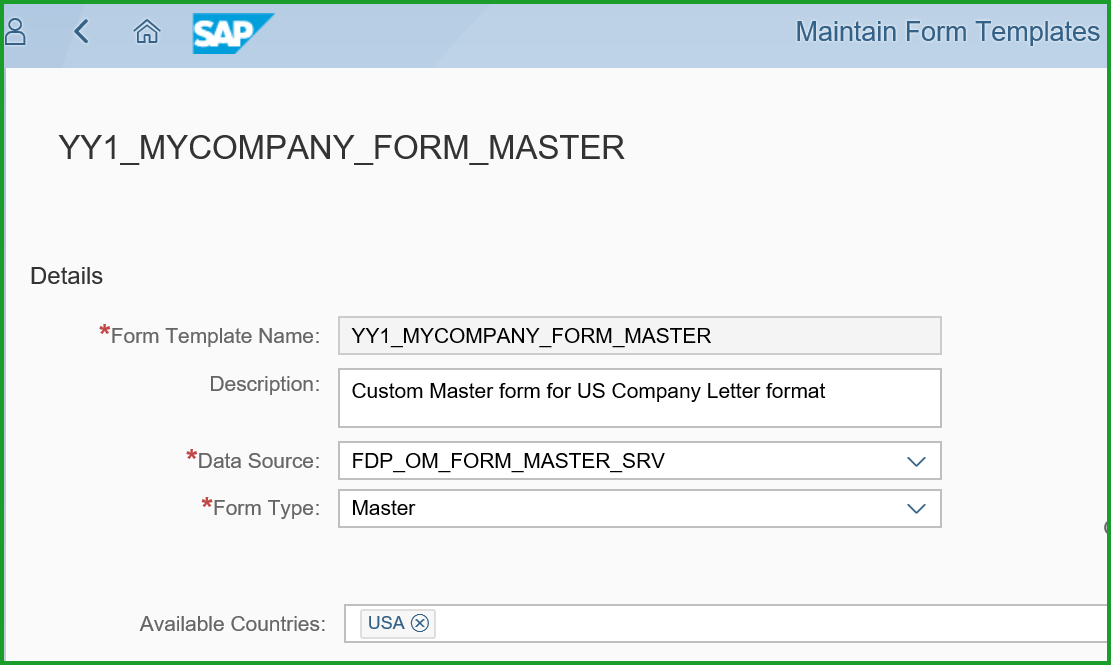
System adds predefined prefix YY1_ to the form template name as shown below. You can enter Description and select Available Countries as below:
STEP 5: SSCUI – MASTER FORM TEMPLATE DETERMINATION
In Q-System select Fiori group – Implementation Cockpit – Fiori tile Manage Your Solution. You will require authorization to Role SAP_BR_BPC_EXPERT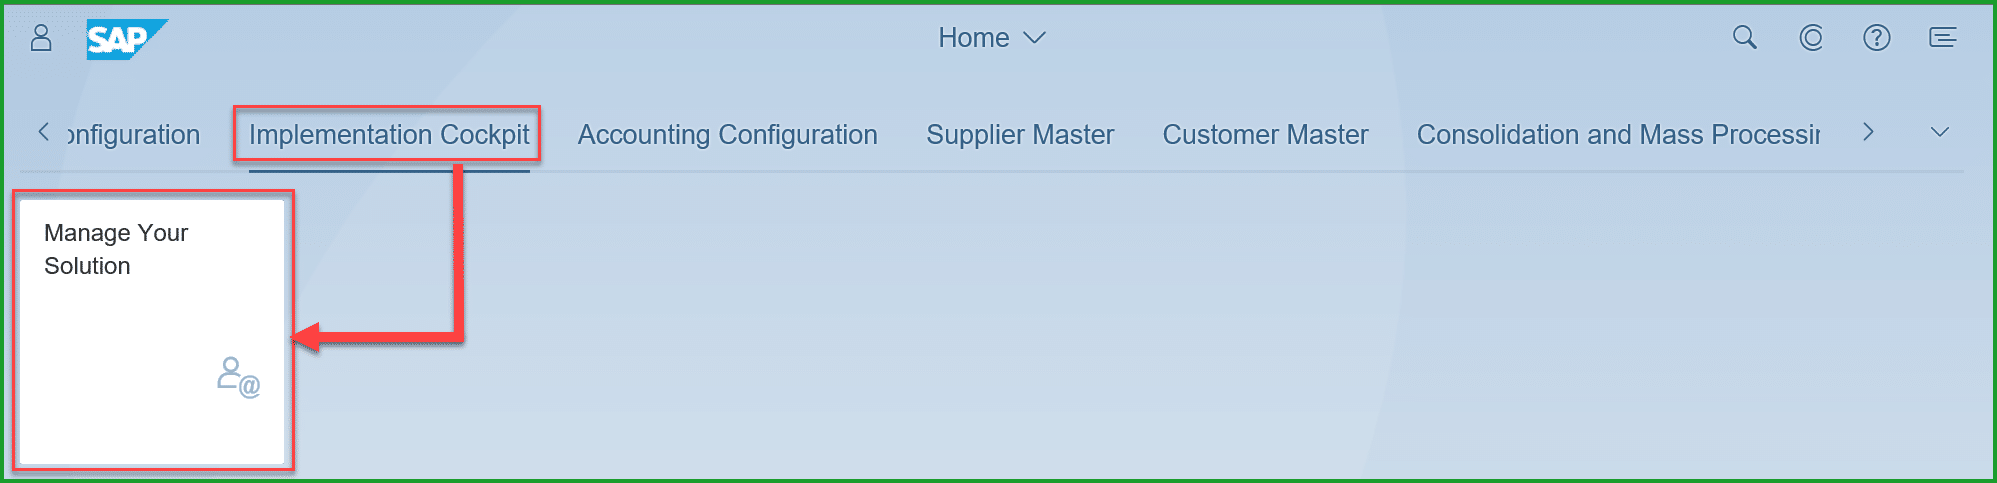
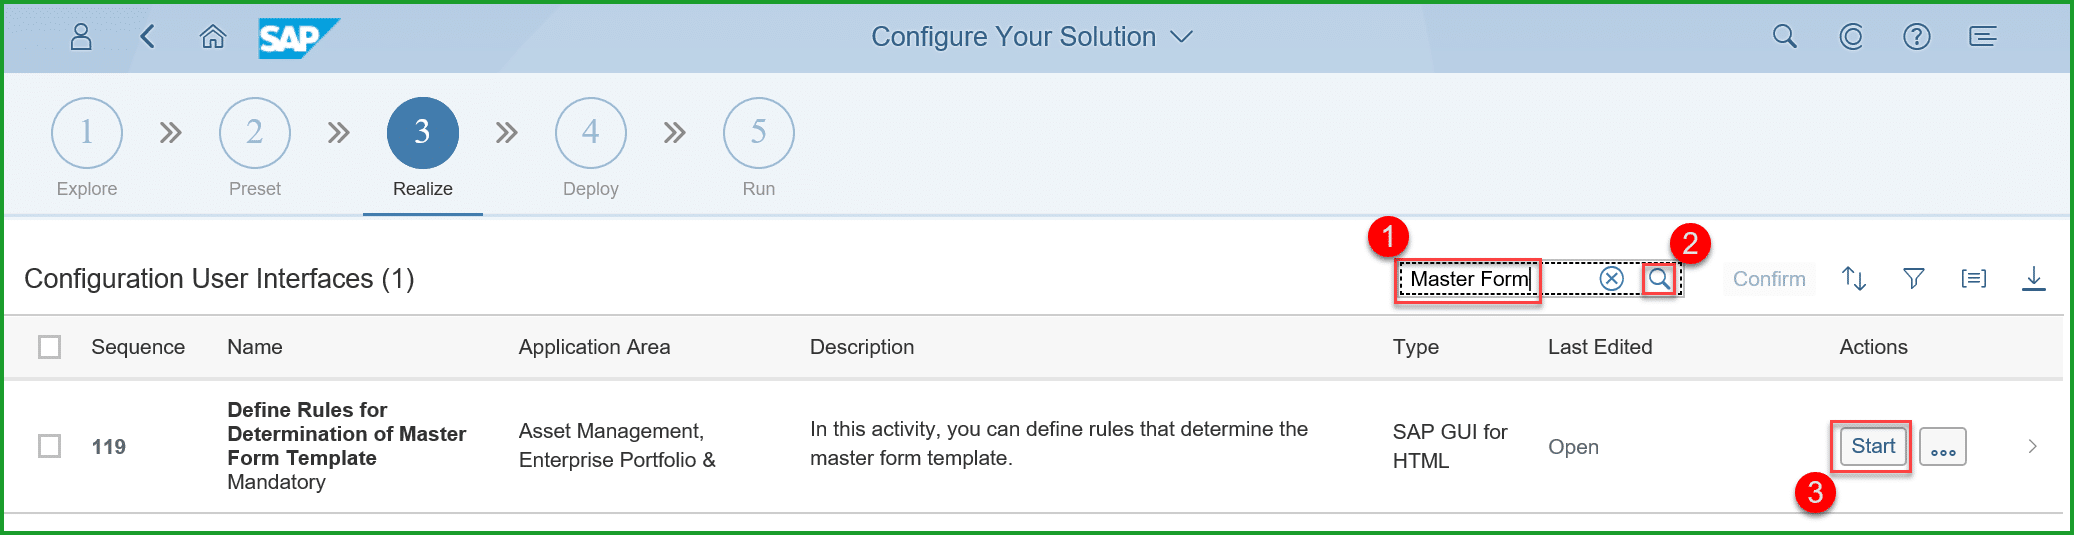
Select Configure Your Solution, enter (1) “Master Form” and click on (2) Search, Select and click on (3) Start
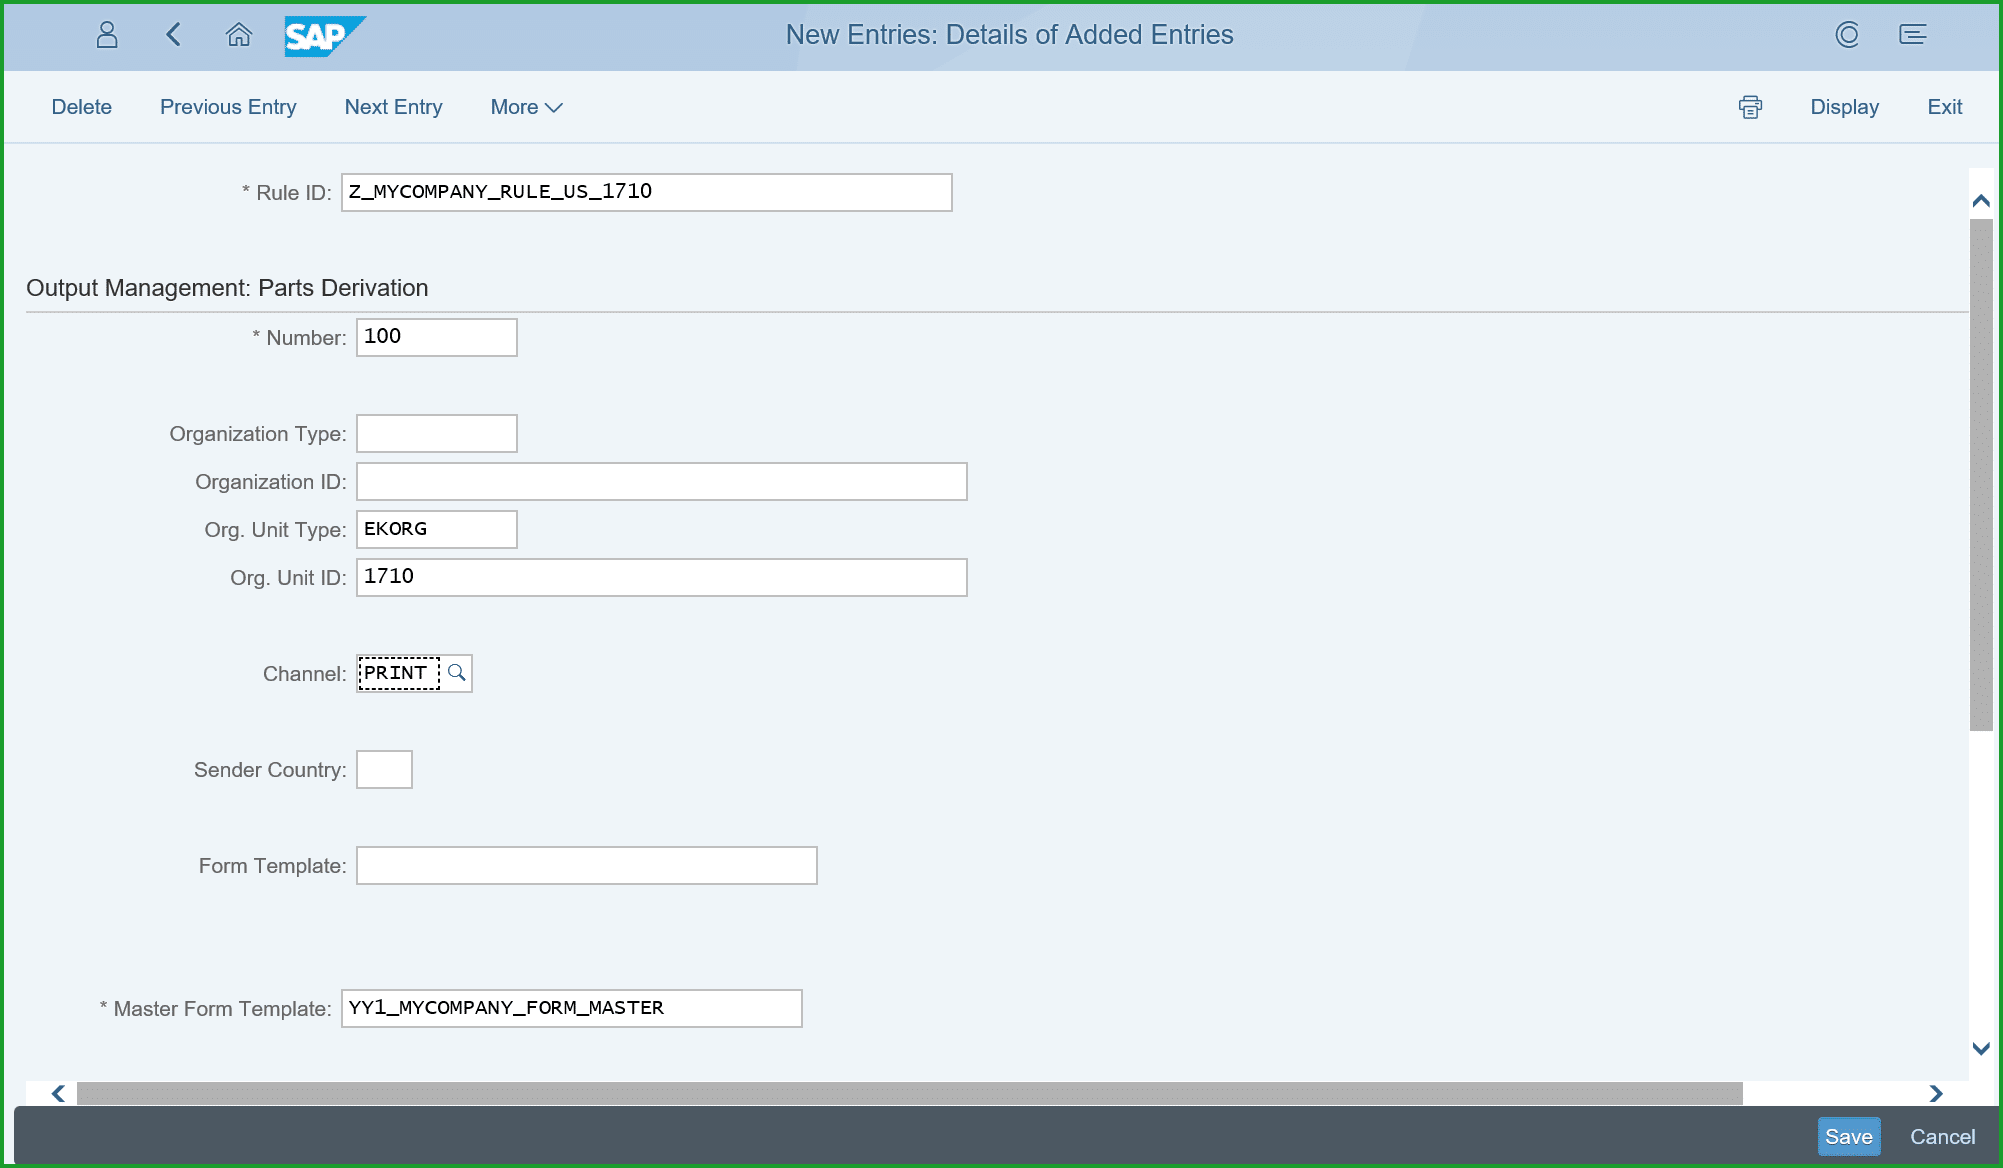
Click on New Entries. Enter Channel = PRINT.
It is optional to restrict the form like shown below Org Unit Type = EKORG (= Purchasing Organization), Org Unit Id = 1710 if this form is meant for and select Master Form Template = YY1_MYCOMPANY_FORM_MASTER as shown below.
TIP: If you are not able to locate the Master Form Template easily, click on Search, expand Restrictions, enter name of form object as YY1_*, click on search and select form the list

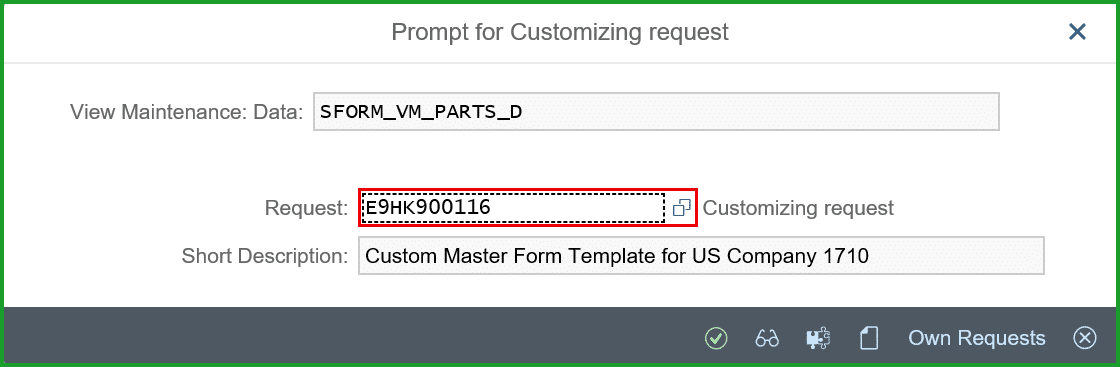
If the system prompts for a transport, please create transport so that the changes are saved and will be available in Production system after Q2P transport.
Click on Save.
The Master form configuration is complete at this point. The steps below are to print a purchase order to check the master form is edited correctly.
STEP 6: CONFIGURE OUTPUT PARAMETER DETERMINATION
In Q System Select Fiori group – Output Control, Fiori tile Output Parameter Determination. You will require authorization with business role SAP_BR_ADMINISTRATOR business catalog SAP_CA_BC_OC.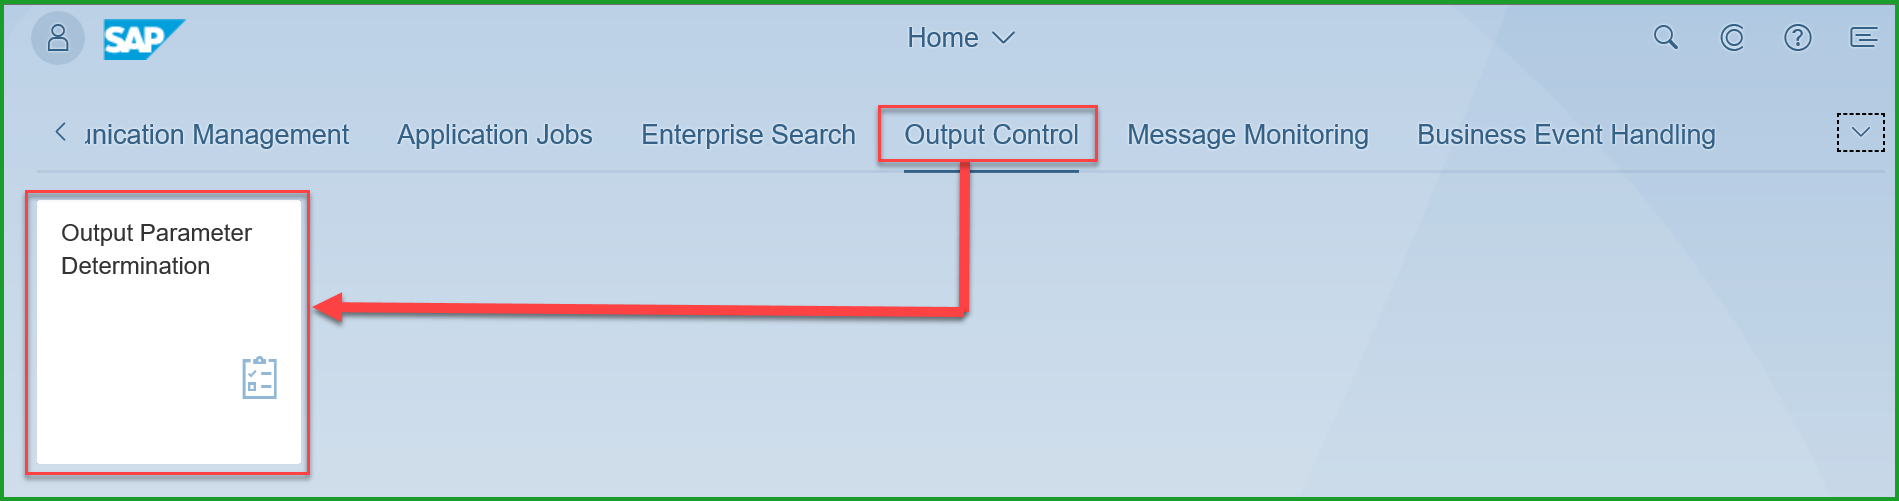
Select Show Rules for (1) Purchase Order Determination Step (2) Output Type and check that Dispatch Time is 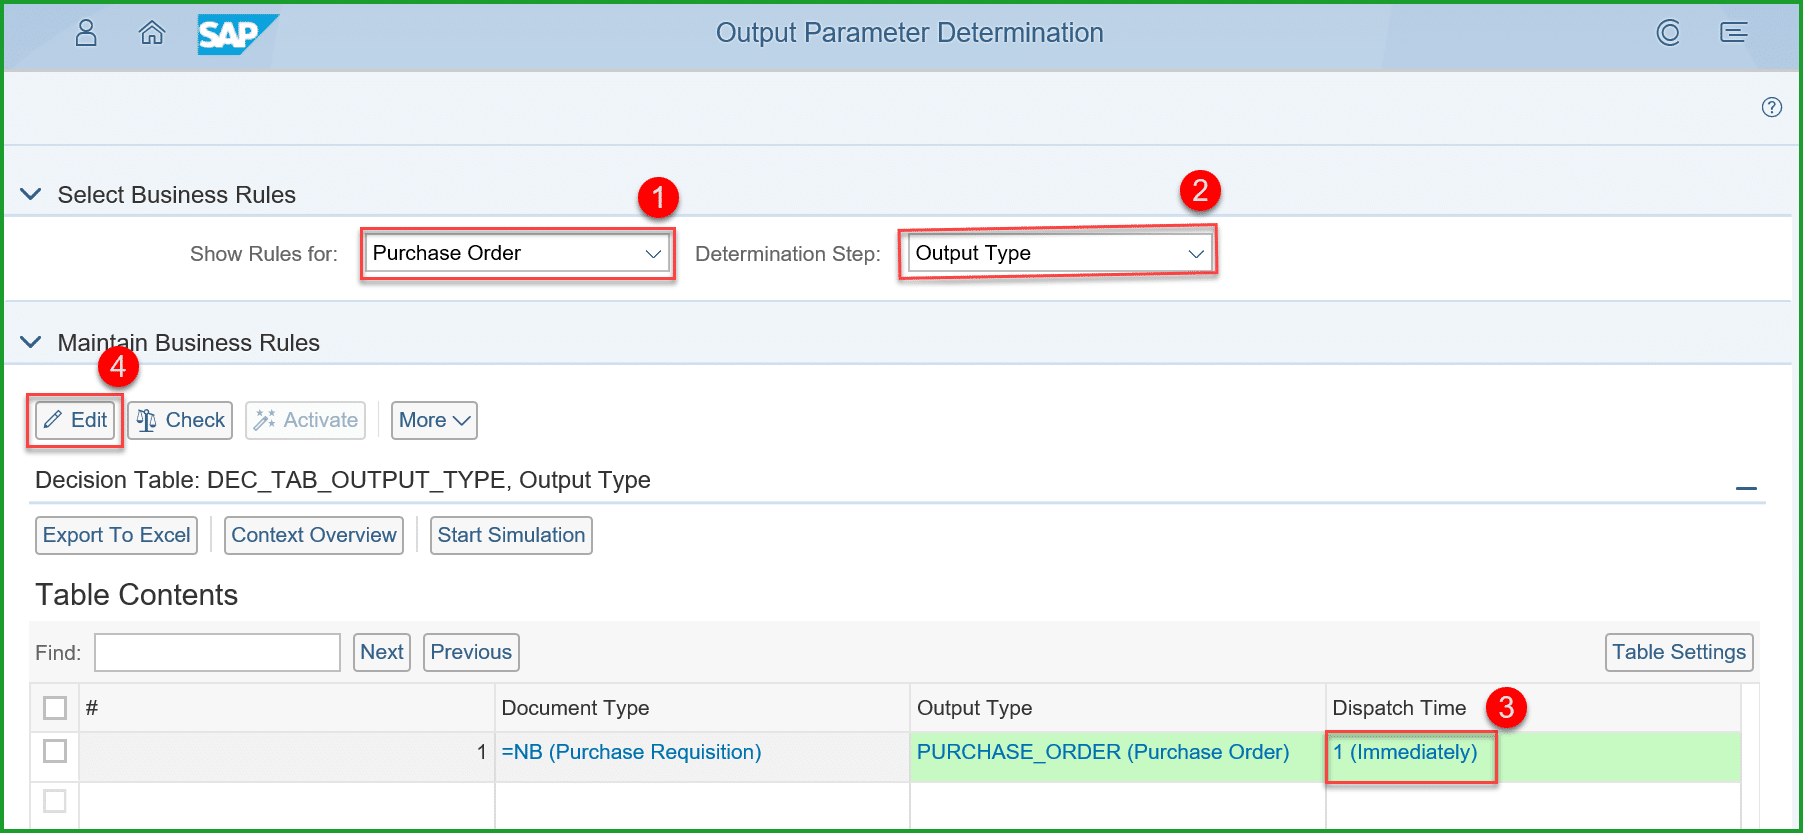 “immediately”
If not, click on (4) Edit and change the value to Immediately.
Check that Determination Step Channel is set to PRINT
Select Show Rules for (1) Purchase Order and Determination Step (2) Printer Settings Click on (3) Edit, select value under Column (4) Print Queue (scroll to the right) and click (5) popup to select the appropriate (Print Queue (6) and click on (7) OK.
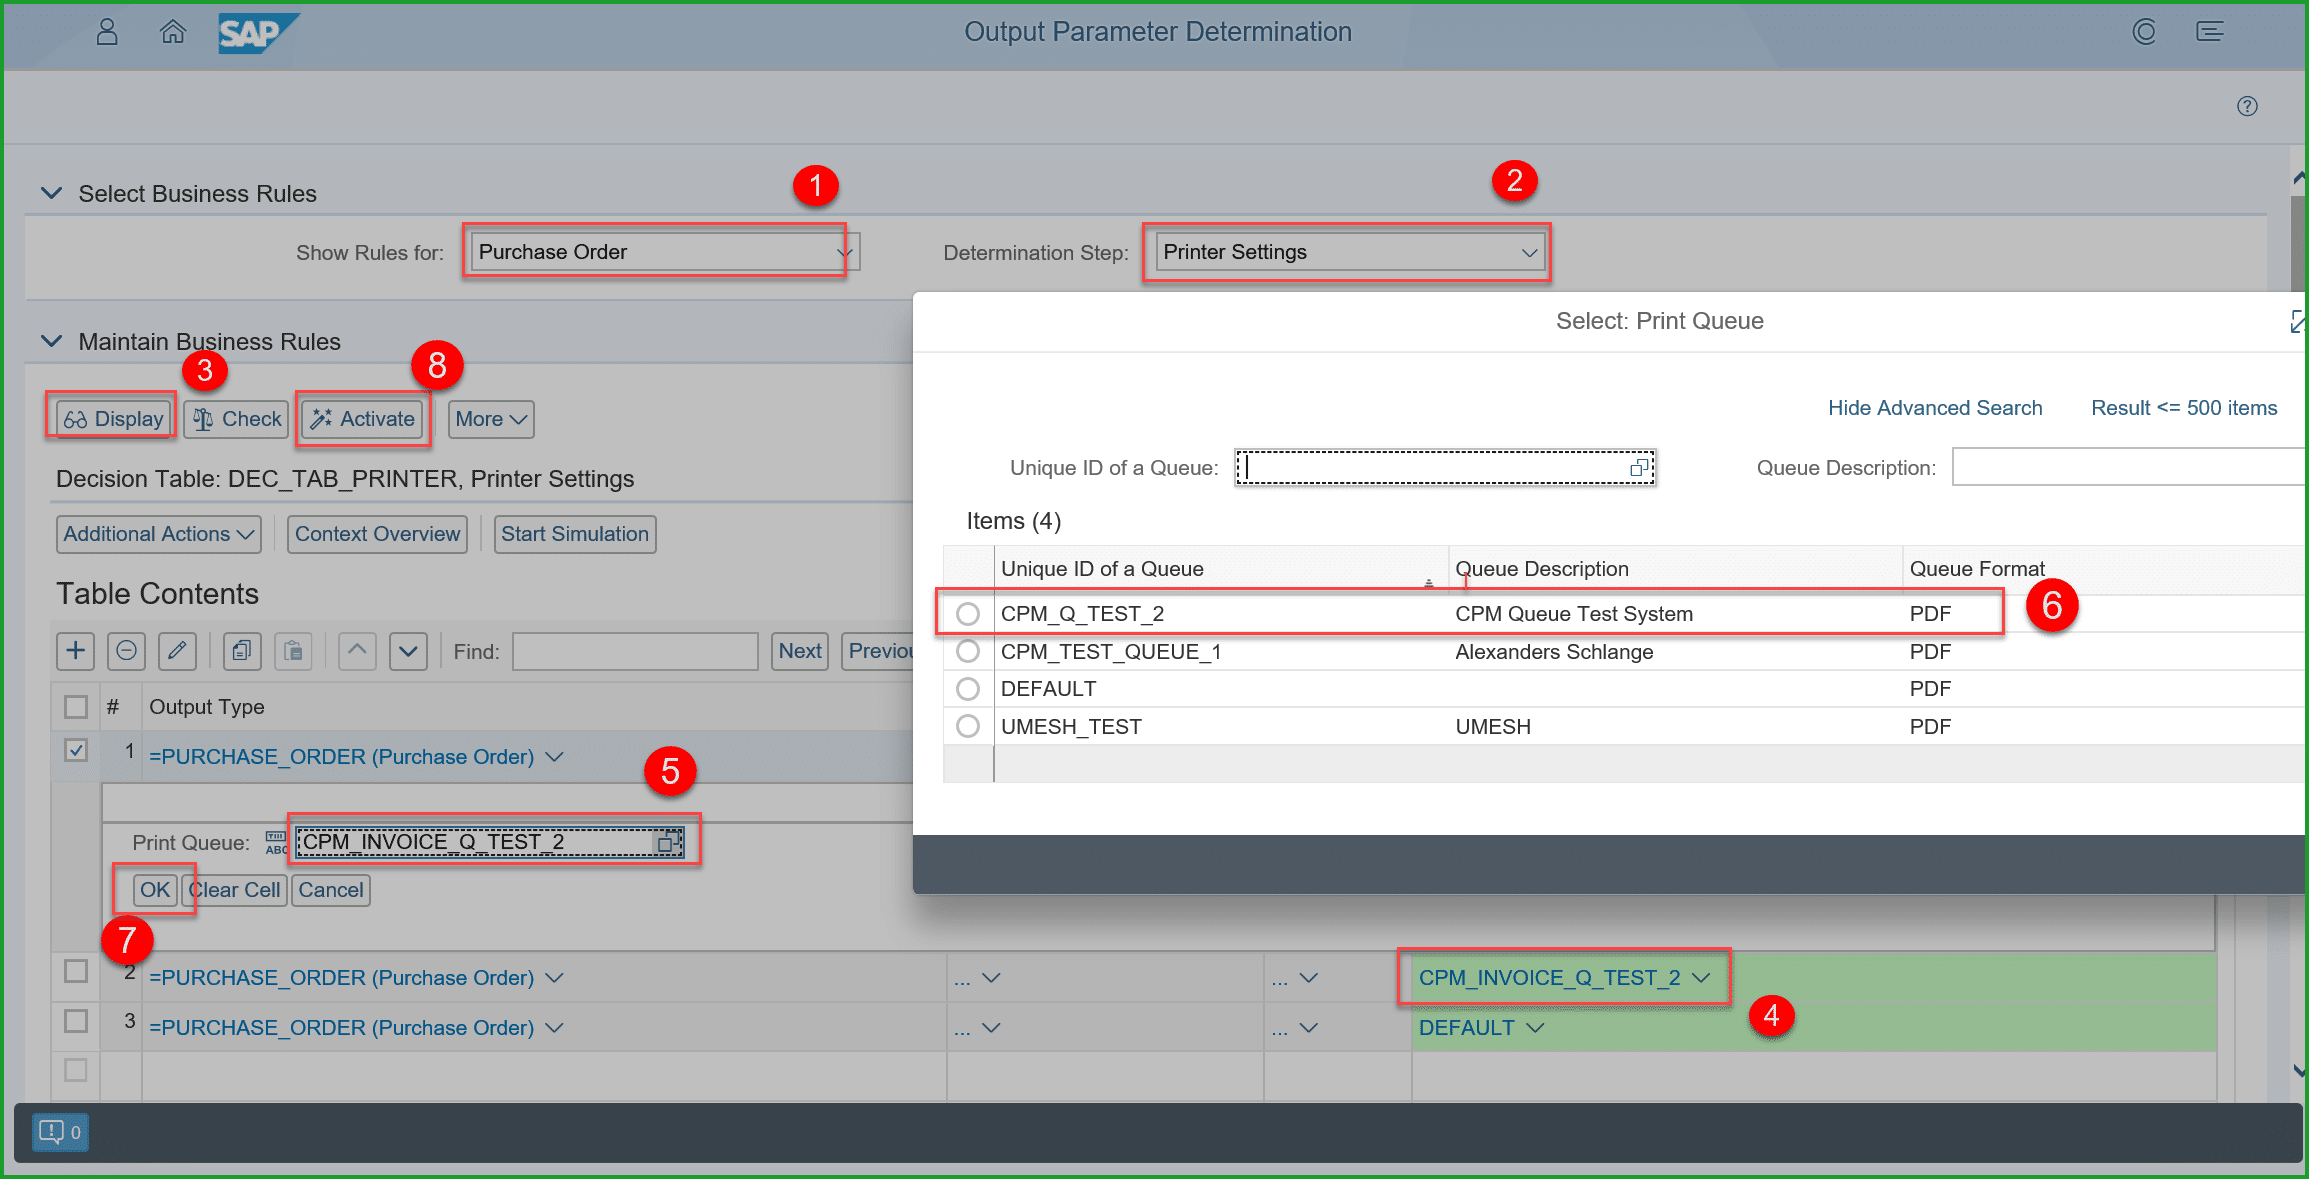
TIP: In the above screen please note there is always a Print Queue by name DEFAULT, but it cannot print to Cloud Print manager. The purpose of DEFAULT queue is for sending any output that does not have queue defined. Also please note that the Print Queues do not belong to a specific business user.
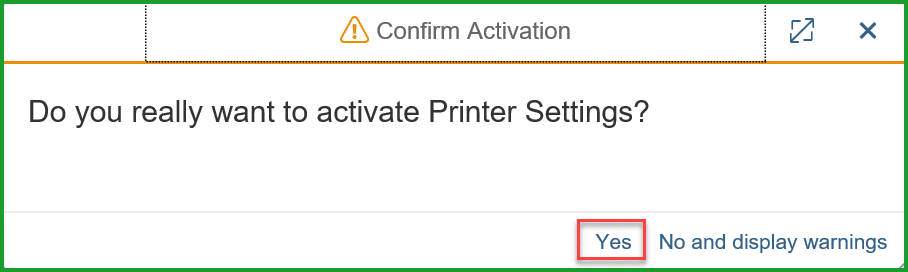
Click on (8) Activate
STEP 7: CREATE PURCHASE ORDER
Select Fiori group – Purchase Order Processing, Fiori tile Manage Purchase Order. You will require authorization with business role SAP_BR_PURCHASER business catalog SAP_MM_BC_PO_PROCESS_PC.
Select one record for Purchase Order.
Please Note – if this is a new system, you will have to add necessary master data details to create new purchase order.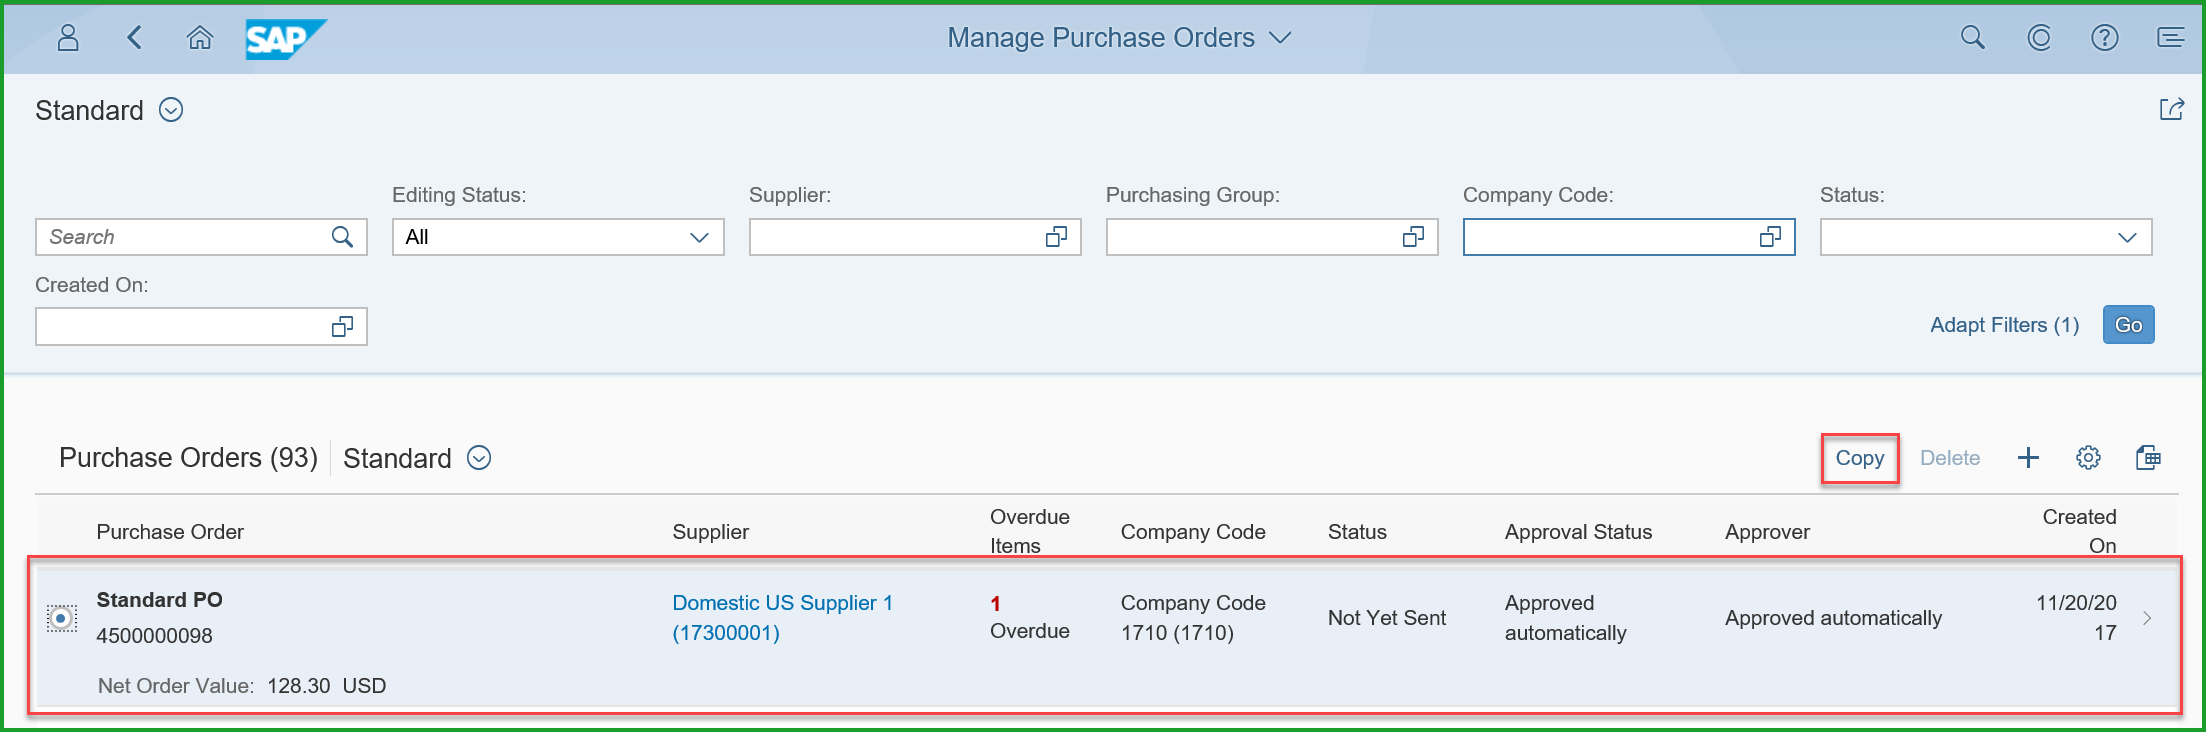
Select the Purchase Order and Click on Copy
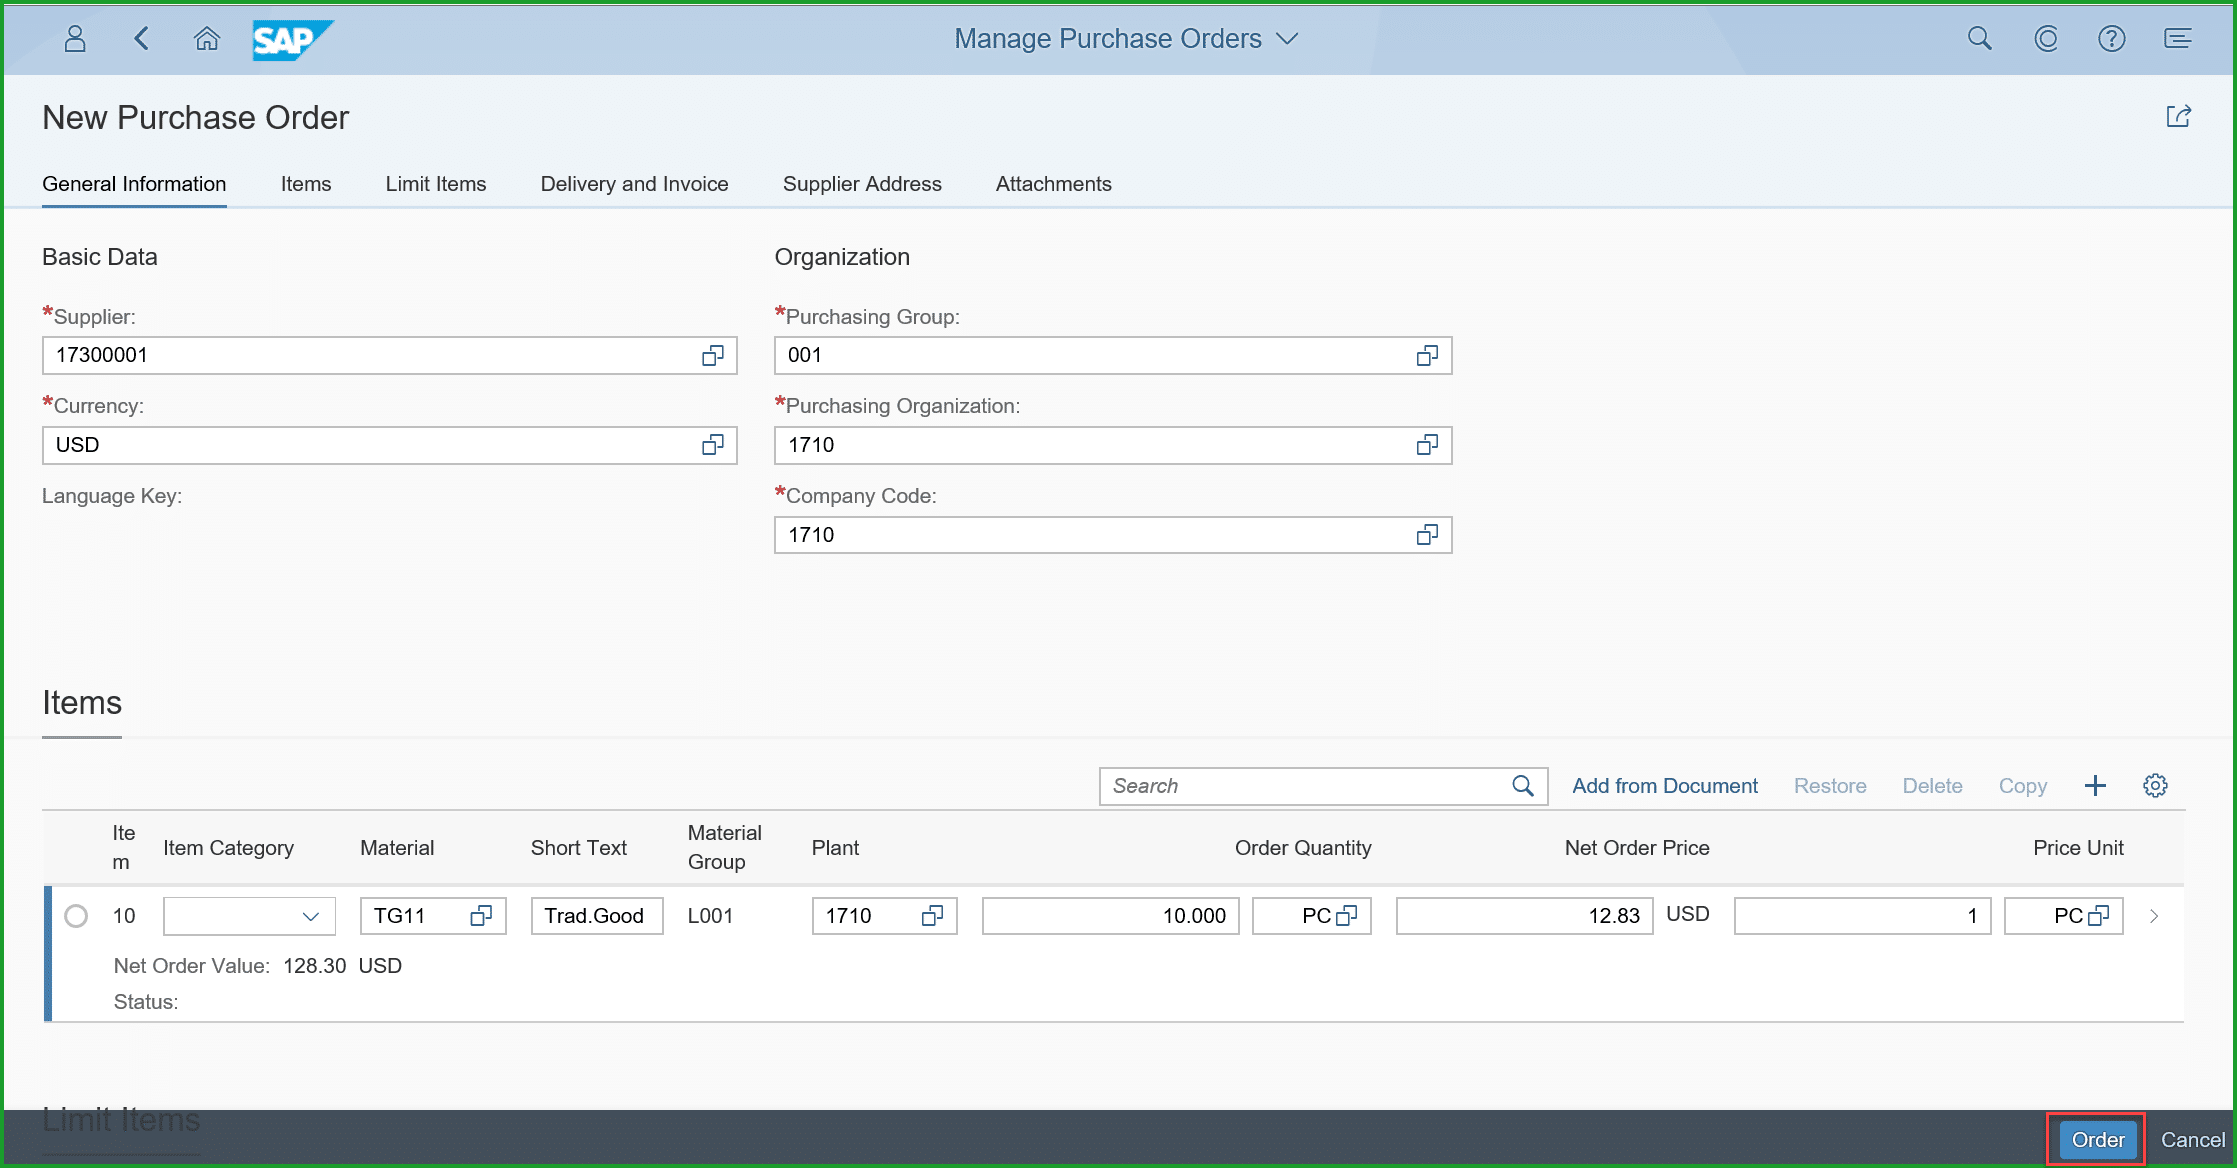
Click on Order, two outputs are generated, eMail and Printout.

Click on Preview icon to display the printout in PDF format.
USEFUL INFORMATION:
- When you download a Content Form you may be prompted to download Master fragment. The purpose of this is so that you see the complete form and is provided just for maintaining the Content form offline.
- Do not move footer blocks into content area.
- Number of forms depends on how many companies X number of languages e.g. 5 companies x 3 languages = 15 forms
- If the Country has different paper size – then separate form is required for each paper size
Thank you,
Mahesh Sardesai
SAP Canada
S/4HANA Cloud Product Expert
New NetWeaver Information at SAP.com
Very Helpfull