Introduction
In this lesson, you will learn how to build native desktop apps with SAP UI5 and Electron. You might be surprised how easy it is to start building high-quality desktop apps for any platform, or even port your existing SAP UI5 app to native desktop platforms.
About Electron
Electron is an open source library developed by GitHub for building cross-platform desktop applications with HTML, CSS, and JavaScript. Electron accomplishes this by combining Chromium and Node.js into a single runtime and apps can be packaged for Mac, Windows, and Linux.
Prerequisites
In this blog I would like to go with a Windows 10 machine, so I’m going to show you how to install all the needed tools for SAPUI5 Desktop application development. We will go through the installation of the following components:
-
Node.js v8.9.2
-
SAP UI5 Runtime v1.48.11 (Optional)
Others
-
Windows 10
-
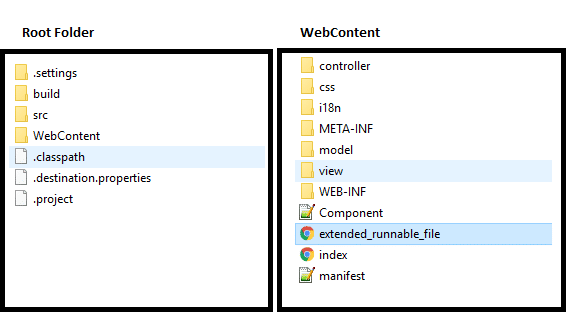
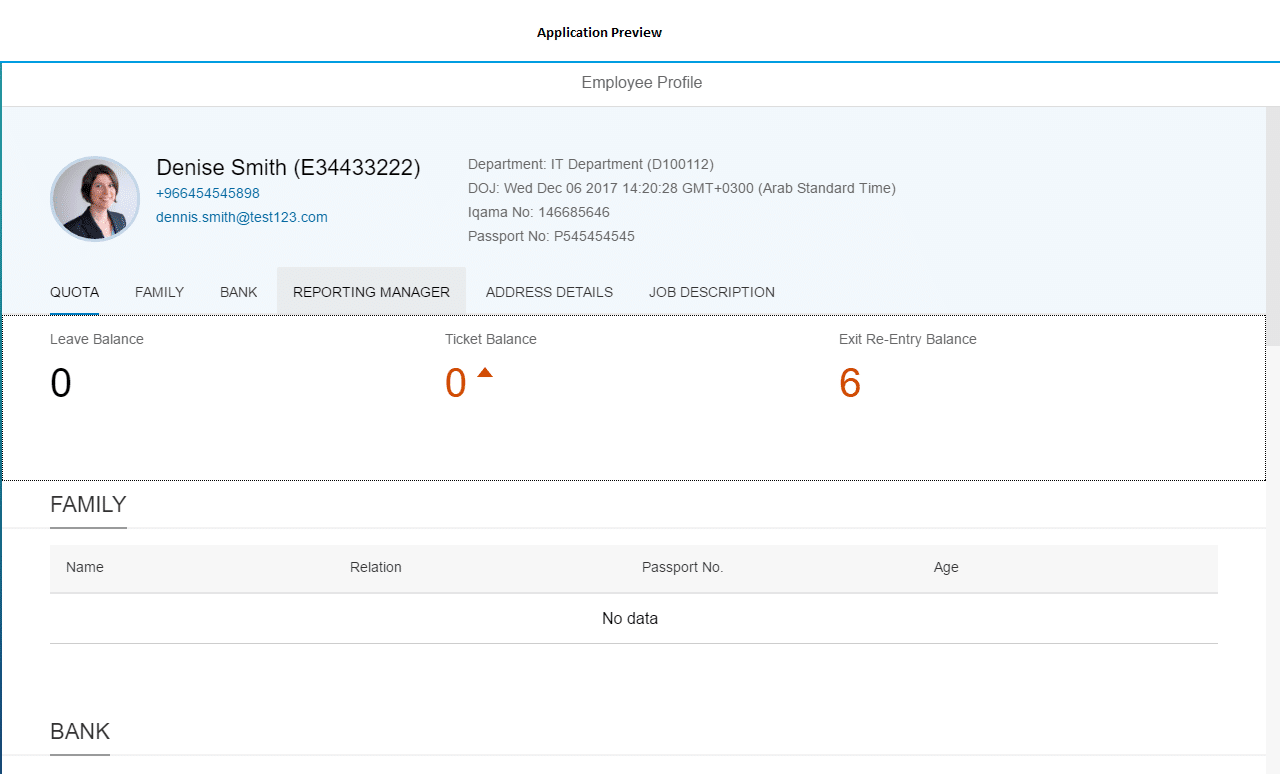
UI5 App: ztest_emp_prfl v1.48
![]()
![]()

Installation/Setup
-
Node.js Setup
Download Node.js version 8 or lower from the link https://nodejs.org/en/ and install.
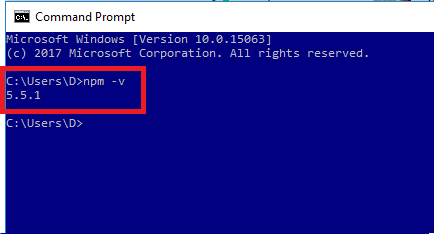
Once installation is done. Open Command Prompt (Windows+R then type “cmd” press Enter) and type “npm –v“. It returns node version if the installation is successful.
![]()
-
SAP UI5 Runtime Libraries (Optional).
Note: This library setup is only required while developing offline application.
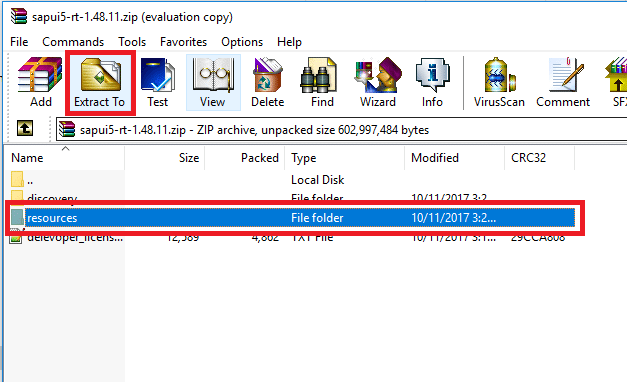
Download SAP UI5 Runtime libraries from the link Click here . Once download is finished open the zip file and extract “resources” folder into your application to “WebContent” folder.![]()
Setting Up Electron Environment and Testing the app
-
Open Command Prompt
press Windows+R, type “cmd” press Enter
-
Navigate to app directory
Run command
cd <path to root folder of your app> // Example cd C:XXXXXXztest_emp_prfl -
Initialize the npm and create “package.json”
Run command
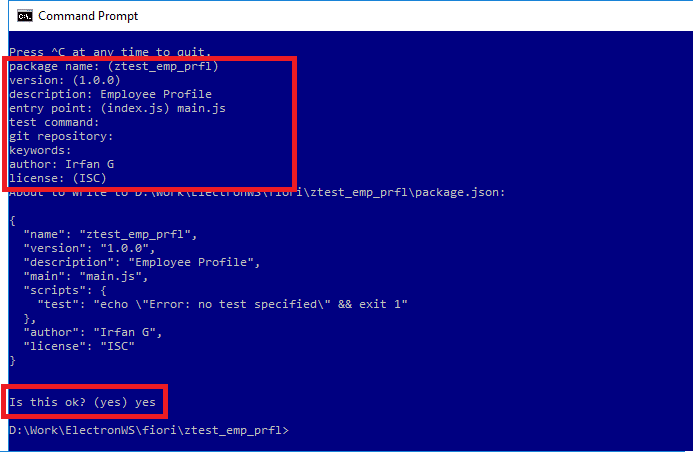
npm initIt will ask few questions and creates package.json file. Enter following details.
description: Employee Profile entry point: (index.js) main.js author: Irfan Gat the end type “yes” and hit Enter.
![]()
A package.json file offers you a lot of great things:
- It serves as documentation for what packages your project depends on.
- It allows you to specify the versions of a package that your project can use using semantic versioning rules.
- It makes your build reproducible, which means that it’s much easier to share with other developers.
-
Create entry point – main.js
Open app folder ie. ztest_emp_prfl and create a file main.js
Create a new file named main.js in the root of your project – this is the Electron NodeJS backend. This is the entry point for Electron and defines how our desktop app will react to various events performed via the desktop operating system. Paste the following code.
const {app, BrowserWindow} = require('electron'); // Global reference of the window object. let mainWindow; // When Electron finish initialization, create window and load app index.html with size 800x600 app.on('ready', () => { mainWindow = new BrowserWindow({ width: 800, height: 600, webPreferences: { nodeIntegration: false } }); // Path to your index.html mainWindow.loadURL('file://' + __dirname + '/WebContent/index.html'); }); -
Modify index.html
Open index.html file and replace resource path like below. Only change “src” property value.
<script id="sap-ui-bootstrap" src="https://sapui5.netweaver.ondemand.com/resources/sap-ui-core.js" data-sap-ui-libs="sap.m" data-sap-ui-theme="sap_bluecrystal" data-sap-ui-compatVersion="edge" data-sap-ui-resourceroots='{"com.empprfl": ""}'> script>Note: If you’re using SAP UI5 Runtime libraries do the following changes.
<script id="sap-ui-bootstrap" src="./resources/sap-ui-core.js" data-sap-ui-libs="sap.m" data-sap-ui-theme="sap_bluecrystal" data-sap-ui-compatVersion="edge" data-sap-ui-resourceroots='{"com.empprfl": ""}'> </script> -
Install Electron and modify package.json file
Open Command Prompt and Run
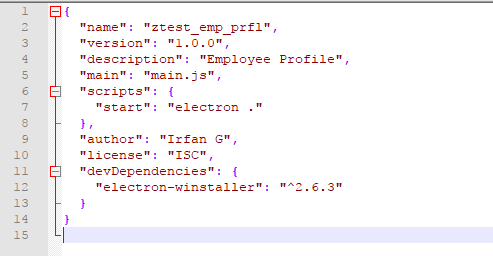
npm install electron --save-devOnce finished. Open package.json and replace the line inside “script” node.
"start": "electron ."this tells npm to run electron from root(“.”) folder. Now your package.json looks like this.
![]()
-
Testing your application by electron.
Open Command Prompt and Run
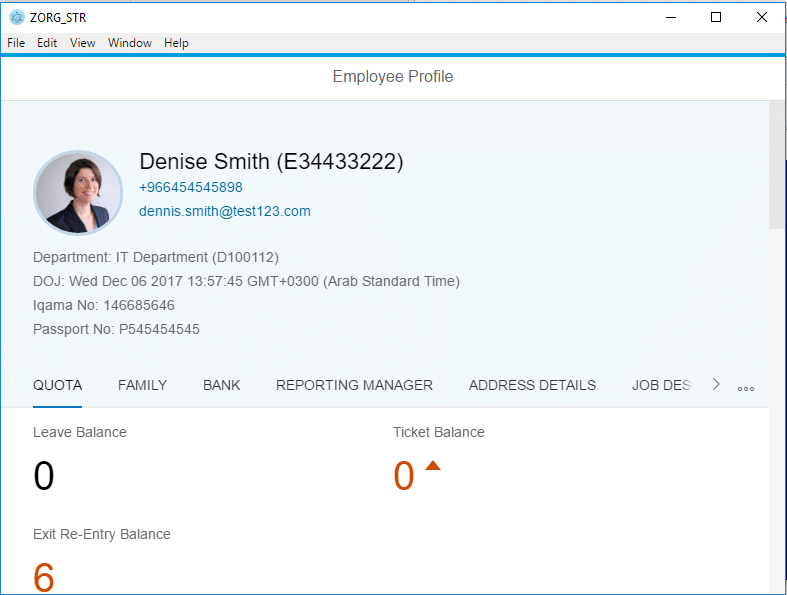
npm startIt will run your application in a window.
![]()
You can also open developer tools to check for errors. In menu select Window-> Toggle Developer Tools or press Ctrl+Shift+I.
Creating Build
-
Open Command Prompt
Press Windows+R, type “cmd” press Enter).
-
Navigate to app directory
Run command
cd <path to root folder of your app> // Example cd C:XXXXXXztest_emp_prfl -
Install Electron Packager
Run below commands in sequence
// for use in npm scripts npm install electron-packager --save-dev // for use from cli (Command Line Interface) npm install electron-packager –g // for creating prebuild npm install --save-dev electron-prebuilt -
Add Icon for the App
Create a folder in root directory to add icon(WinIcon.ico) to your application. I’ll create folder as below
Xxx/xxx/ztest_emp_prfl/assets Xxx/xxx/ztest_emp_prfl/icons Xxx/xxx/ztest_emp_prfl/WinIcon.icoPlease make sure your icon type. It varies from different platforms.
// For windows = XXX.ico // For Mac = XXX.icns // For Linux = XXX.pngDownload all 3 types of icon from https://www.iconarchive.com
-
Setting productname and electron version
open up package.json and add a productname after the “name” node.
"productName": "Employee Profile App",And use below command line to build the app for particular platform.
// For Mac electron-packager . --overwrite --platform=darwin --arch=x64 --icon=assets/icons/WinIcon.ico --prune=true --out=release-builds // For Windows electron-packager . ztest_emp_prfl --overwrite --asar=true --platform=win32 --arch=ia32 --icon=assets/icons/WinIcon.ico --prune=true --out=release-builds --version-string.CompanyName=CE --version-string.FileDescription=CE --version-string.ProductName="Employee Profile App" // For Linux electron-packager . ztest_emp_prfl --overwrite --asar=true --platform=linux --arch=x64 --icon=assets/icons/WinIcon.ico --prune=true --out=release-buildsNote: In the command, change your application name, package name and path to the icon. And also it’s syntax is different for different platforms.
Now pick the windows command and you can execute this command directly from command line or we can place this command in package.json and execute it using npm. Open package.json and add this command as following inside “script” node. At the end package.json look like this.
{ "name": "ztest_emp_prfl", "productName": "Employee Profile App", "version": "1.0.0", "description": "Employee Profile", "main": "main.js", "scripts": { "start": "electron .", "package-win": "electron-packager . ztest_emp_prfl --overwrite --asar=true --platform=win32 --arch=ia32 --icon=assets/icons/WinIcon.ico --prune=true --out=release-builds --version-string.CompanyName=CE --version-string.FileDescription=CE --version-string.ProductName="Employee Profile App"" }, "author": "Irfan G", "license": "ISC", "devDependencies": { "electron": "^1.7.9", "electron-packager": "^10.1.0", "electron-prebuilt": "^1.4.13" } } -
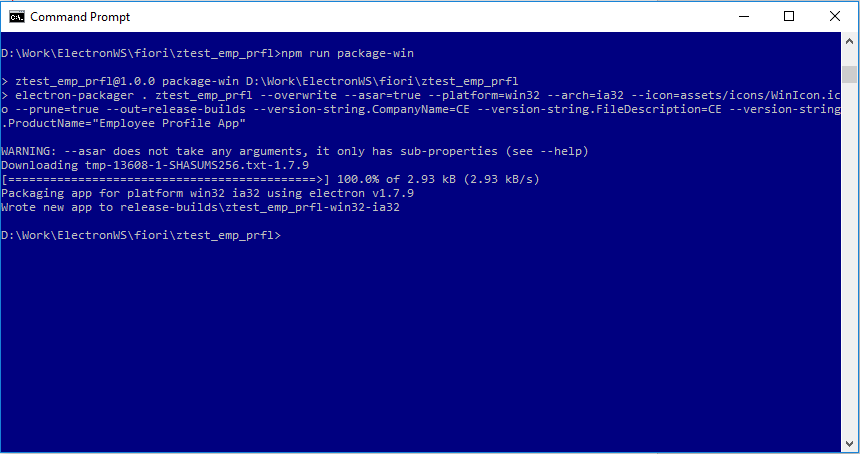
Now run the build command.
npm run package-winHere package-win is the property which is specified under “script” node of package.json. Like wise you can add particular name for other platforms, specify the particular command and execute it.
![]()
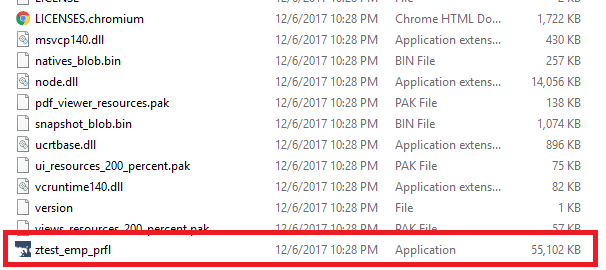
Once it’s success, Congrats!!! Your desktop application is ready. Go to your app folder inside that new folder will be created as “release-builds” under that look for file created with the app name with extension as “.app” as “ztest_emp_prfl.app”. Double click on it to run the application.
![]()
Final Desktop App
![]()
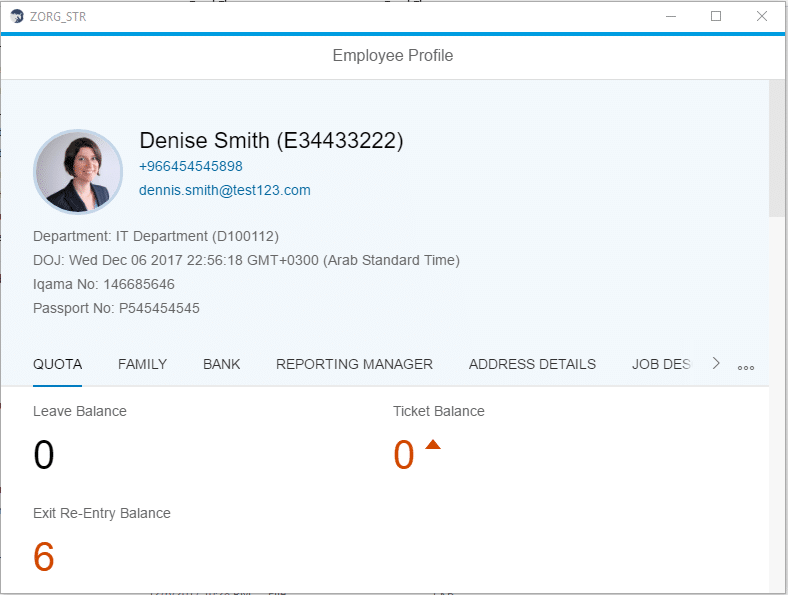
That’s it!!!
Debugging/Error Solving.
-
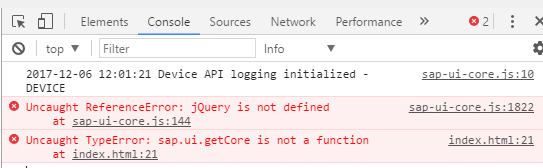
In Developer Tools – JQuery is not found.
Add webPreferences property inside main.js like below
mainWindow = new BrowserWindow({ width: 800, height: 600, webPreferences: { nodeIntegration: false } });![]()
-
Command Options –verbose
Check for the what’s happening while executing any command by adding –verbose option at the end of every command. It will show all the background processes while running the command.
// Example npm start –verbose -
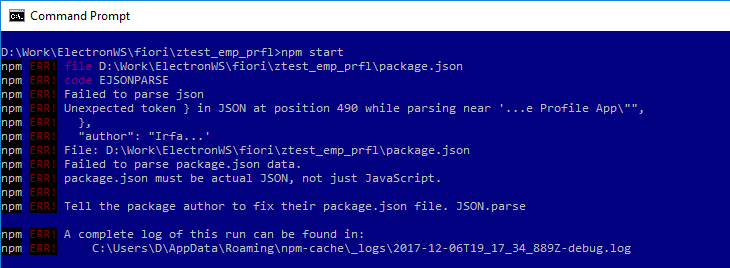
Failed to parse json
Check for extra commas and braces in package.json
![]()
That’s it!!! Hope my concept is clear and easy to understand
Thank You!!!